|

This tutorial is from Barbara de Venise who I thank for
letting me translate their tutorials.

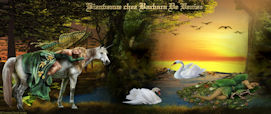
Original here
Tubes
Virginia
Barbara
Material

Many thanks to the creators of
these materials

Plugins
Unlimited 2
Mura's Meister
Mura's Seamless
Eye candy 5: Impact
AAA Frames
You can find these plugins on the websites of:
Renée
Cloclo
You can also find this tutorial translated into these languages:
(Click on the flag)


SCRIPT
Notes:
> Open the material / Duplicate (shift+d) / Close the originals
> Change the blend mode of the layers to match their colors.
> In older versions of PSP, Mirror Horizontal=Mirror / Mirror Vertical=Flip /
Pick tool=deformation
> Open the masks in psp and
minimize
>Adjust the size of the tubes according to your images
*
Step 1
Colors: Foreground: #768a9e / Background: #28313a

Open alpha channel - Duplicate (shift+d) - Close original
Selections - Select all
Copy [image-hiver] and paste into selection
Select none
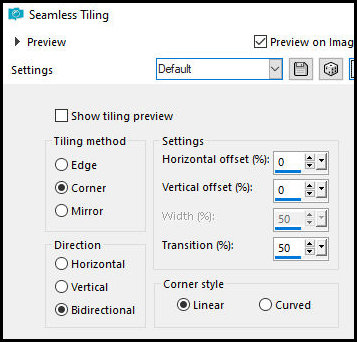
Effects - Image Effects - seamless Tiling
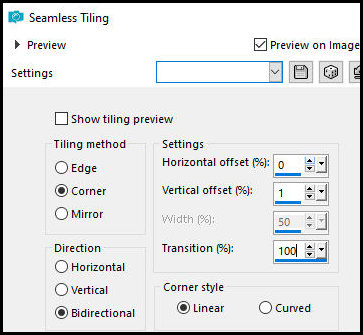
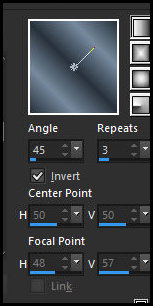
Adjust - Blur - Radial Blur

Effects - Image Effects - seamless Tiling - default
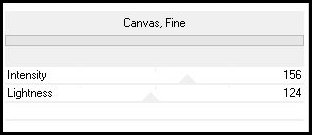
Effects - Plugins - Unlimited 2 - Paper Texture - Canvas, Fines
Step 2
Add new layer
Paint with color #768a9e
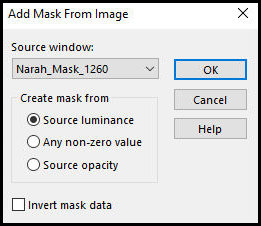
Layers - New Mask Layer - From Image - Mask [ Narah_Mask_1260]
Effects - Edge Effects - Enhance more
Merge Group
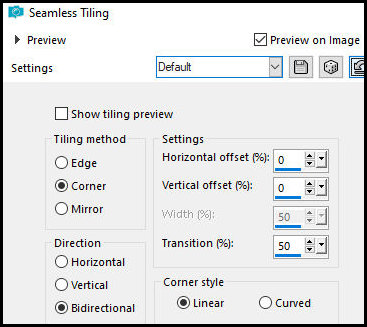
Effects - Image Effects - Seamless Tiling - Default
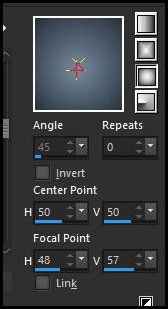
Prepare a Sunburst Gradient
Add new layer
Paint with this gradient
Step 3
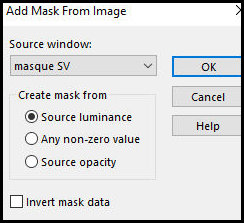
Lay s- new Mask Layer - From Image - Mask [masque-SV]
Merge Group
Copy the tube [misted-hiver-1] and paste as a new layer
Add new layer
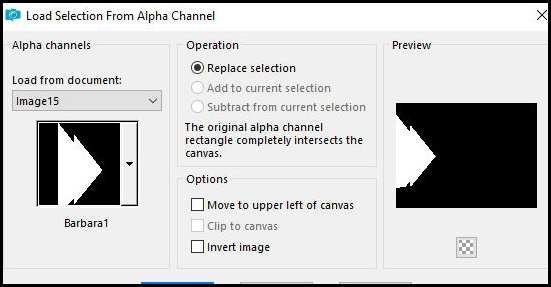
Selections - Load selection from alpha channel - Selection [Barbara
1]
Paint with the Sunburst gradient
Effects - Plugins - Carolaine and Sensibility - CS_DLines
Step 4
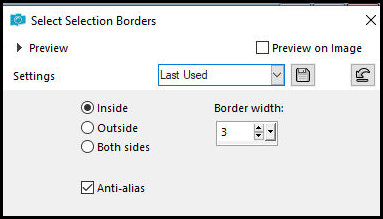
Selections - Modify - Select selection borders
Paint the selection with the color #28313a
Select none
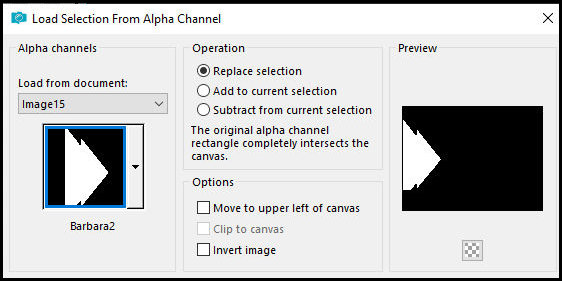
Selections - Load selection from alpha channel - Selection [Barbara
2]
Copy the tube [misted-river] and paste it as a new layer
Using the Move tool, position the tube on top of the selection,
selecting the part of the image that looks best
Selections - Invert
Press Delete on the keyboard
Selections - invert
Step 5
Add new layer
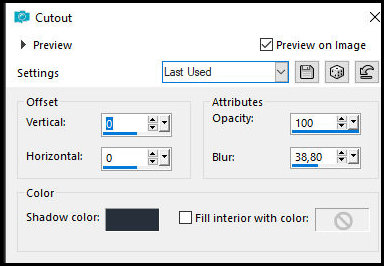
Effects - 3D Effects - Cutout - background color
Select none
Merge down - Apply twice
Layers - Duplicate
Image - Mirror - mirror Horizontal
Merge Down
Drop shadow: 0 0 80 15 background color
Activate the second layer from bottom to top
Layers - Duplicate
Layers - Arrange - Bring to top
Effects - plugins - Mura's Meister - Perspective Tiling

Step 6
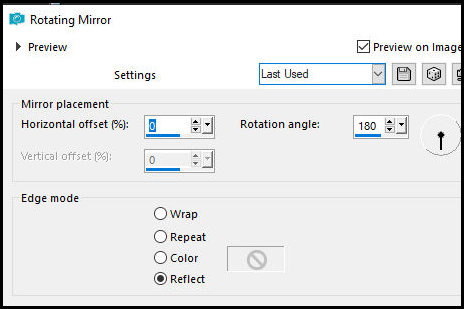
Effects - Reflection Effects - Rotating Mirror
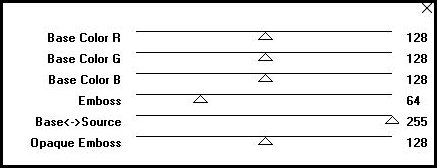
Effects - Plugins - Mura's Seamless - Emboss at Alpha - default
Drop Shadow: 1 1 80 4 color #28313a
Prepare a Linear gradient
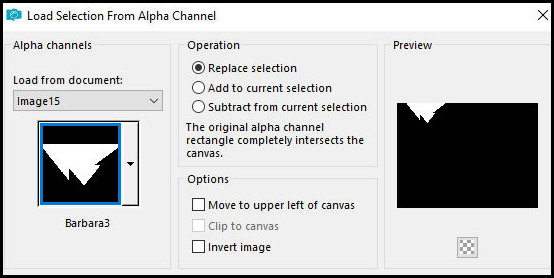
Selections - Load selection from alpha channel - Selection [Barbara
3]
Add new layer
Paint with the gradient
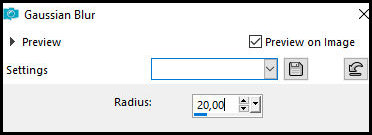
Adjust - Blur - Gaussian Blur=20
Step 9 (I am following the sequence of tutorial, in the original the
author skipped from step 6 to 9)
Effects - Plugins - Carlaine and Sensibility - CS_DLines
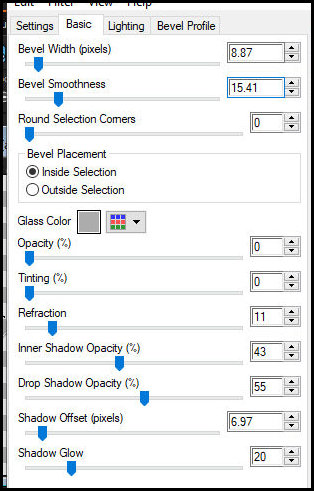
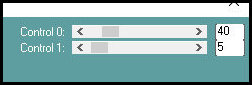
Effects - plugins - Eye candy 5: Impact - Glass - Preset [Clear]

Select none
Drop shadow: 1 1 80 4 black
Layers - Duplicate
Image - Mirror - Mirror Horizontal
Merge Down
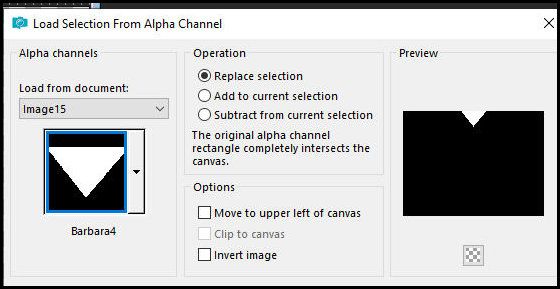
Step 10
Selections - Load selection from alpha channel - Selection [Barbara
4]
Add new layer
Paint with the gradient
Adjust - Blur - Gaussian Blur=20

Effects - Plugins - Eye Candy 5: Impact - Glass - same as above
Select none
Dro Shadow: 1 1 80 4 black
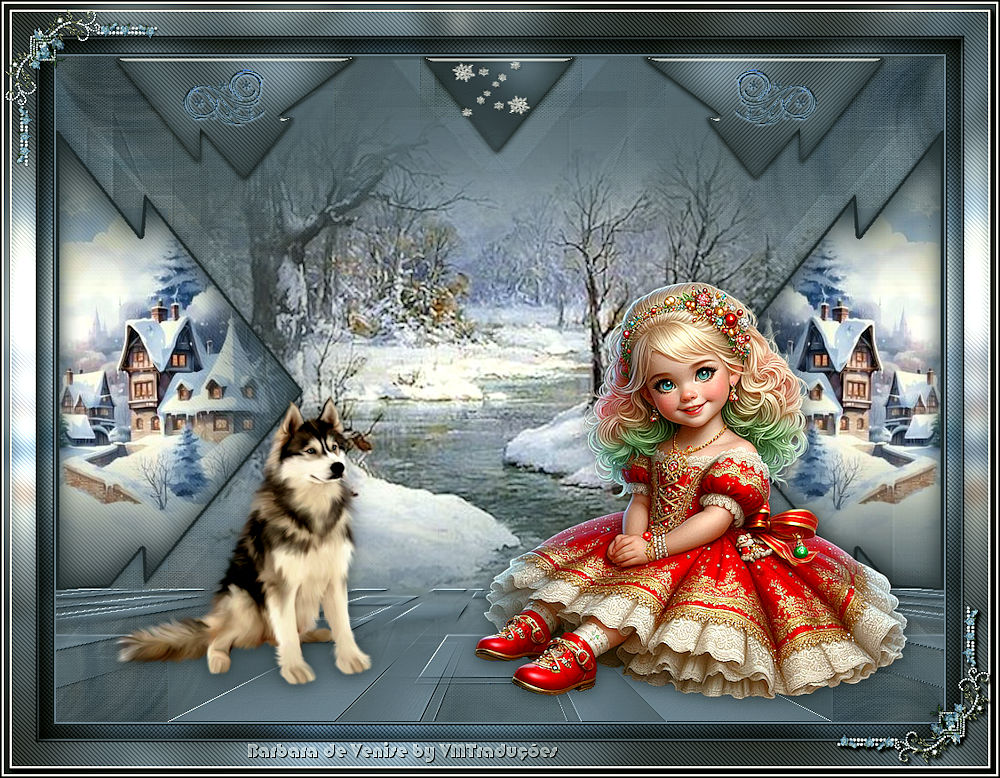
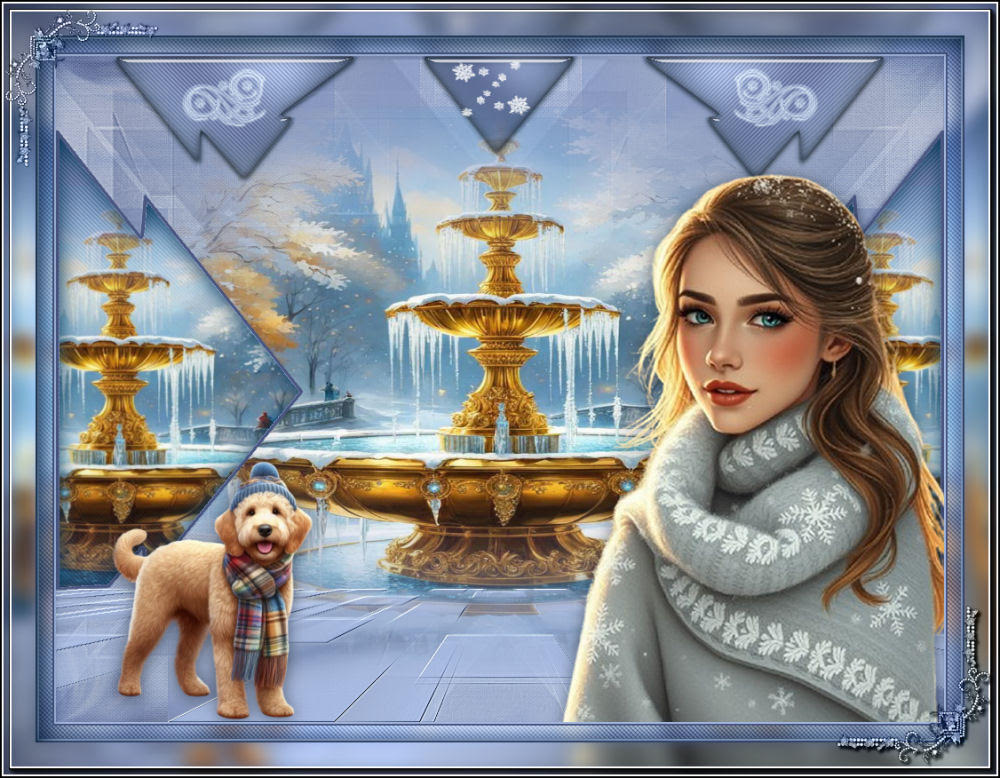
Copy the tube [Fillette] and paste it as a new layer
Activate the Pick Tool and configure: X=433 - Y=259

Effects - Plugins - Eye Candy 5: Impact - Perspective shadow

Copy the tube [chien] and paste it as a new layer
Use the Pick Tool and set it to: X=79 - Y=403
Effects - Plugins - Eye Candy 5: Impact - Perspective shadow - same
as before Step 11

Copy the tube [deco] and paste it as a new layer
Activate the Pick Tool and set: X=141 - Y=13
Layers - Duplicate
Image - Mirror - Mirror Horizontal
Merge Down
Copy the tube [deco1] and paste it as a new layer
Activate a Pick tool and set: X=442 - Y=5
Image - Add borders - 2px - foreground color
Image - Add borders - 2px - background color
Copy (will be saved in memory)
Selections - Select all
Image - Add borders - 15px - white
Selections - invert
Paste the image that is in memory into the selection
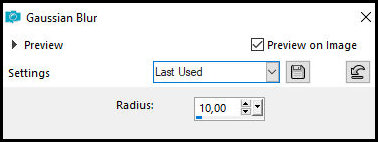
Adjust - Blur - Gaussian Blur=10

Effects - Plugins - Graphic Plus - Cross Shadow - default
Effects - Plugins - Carolaine and Sensibility - CS-DLines - same as
above
Selections - Promote selection to layer
Select none
Layers - Duplicate
Image - Mirror - Mirror Horizontal
Layers - Properties - Blend mode: overlay - opacity=70%
Step 12
Merge visible
Image - Add borders - 2px - foreground color
Image - Add borders - 2px - background color
Selections - Select all
Image - Add borders - 40px - white
Selections - invert
Paste the image in memory into the selection
Adjust - Blur - Gaussian Blur=10
Effects - Plugins - Graphic Plus - Cross shadow - default
Effects - Plugins - Carolaine and Sensibility - CS_DLines - equal
previous
Drop Shadow: 5 5 100 40 black
Select none
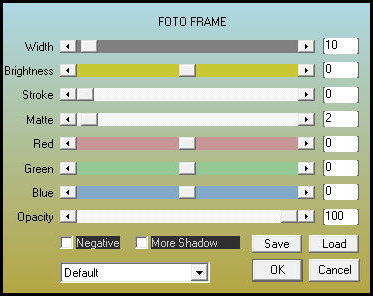
Effects - Plugins - AAA Frames - Photo Frame
Step 13
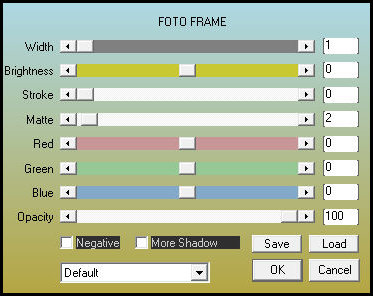
Effects - Plugins - AAA Frames - Photo Frame with this other
configuration
Copy the tube [coins] and paste as a new layer
Do not move
Merge Visible Place signatures
Merge all
Save as jpeg
*
Thank you Irene for testing my translations

|