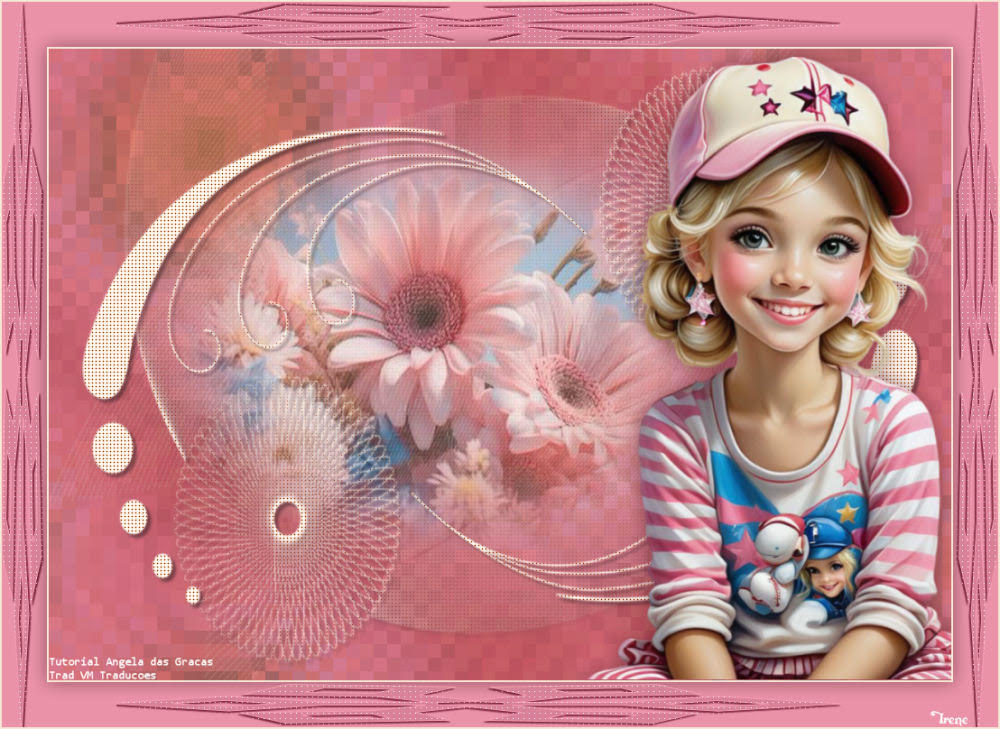
This tutorial is by Angela das Graças, whom I thank for letting me
translate her tutorials.
SCRIPT
Notes:
> Open the material / Duplicate (shift+d) / Close the originals
> Change the blend mode of the layers to match their colors.
> In old versions of PSP Mirror Horizontal=Mirror / Mirror
Vertical=Flip / Pick tool=deformation
1. Open the mask [smArt_maszk_72] on the psp and minimize
2. Place the Seamless Tiling [wings backs] preset in the PSP
Presets folder
3. Open a new transparent image with 1000x700px
4. Paint with a predominant color in your tube
5. Selections / Select all
6. Copy the main tube [angelagmn11] and paste it into the
selection
7. Select none
8. Effects / Image Effects / Seamless Tiling - preset [wings
back] or as shown in the print

9. Adjust / Blur / Gaussian Blur=20

10. Effects / Plugins / Unlimited 2 / unPlugged Tools / Spiral

11. Effects/ Image Effects / Seamless Tiling - Preset [Wings
back] or as per print - APPLY 2 TIMES

12. Note the RGB of the color used at the beginning
| To find out the RGB of a color, position the
mouse cursor over the color for a few seconds and
note the R, G and B values that appear or, in the
color table, click on the color and in the window
that appears, click on Slider and select the RGB
Sliders option and note the numbers in Red, Green
and Blue. |
13. Effects / Plugins / Unlimited 2 / UnPlugged Effects / Neon,
enter the RGB numbering

14. Effects / Distortion Effects / Pixelate

15. Add new layer
16. Paint with a light color from your tube
17. Layers / New mask layer / From image / Mask [smArt_maszk_72]

18. Merge Group
19. Layers / Duplicate
20. Image / Mirror / Mirror horizontal
21. Image / Mirror / Mirror Vertical
22. Merge down
23. Effects / Artistic Effects / Halftone

24. Drop shadow: 4 4 60 4 black
25. Copy the misted landscape tube and paste it as a new layer
26. Layers / Arrange / Move down
27. Adjust the size of the mask, using resize and/or the Pick
Tool, so that it fits inside one of the circles in the mask as
per the model.
28. Copy the tube character [angelagmn11] and paste it as a new
layer
29. Layers / Arrange / Bring to top
30. Position as you prefer
31. Drop Shadow: 0 0 60 30 black or setting of your choice
32. The Layers will look like this:

33. Image / Add borders / Symmetric checked:
2px / light color
50px / dark color
34. Select the 50px border with the Magic Wand [tolerance/feather=0]
35. Selections / Invert
36. Drop shadow: 0 0 60 30 black
37. Select none
38. Copy the deco [deco_angelagmn41] and paste it as a new layer
39. Colorize according to your colors, using the method of your
preference
40. Image / Add borders / 2px / white
41. Image / Resize: 1000px (width) - all layers checked
42. Place the signatures
43. Merge all
44. Save as jpeg
*
Thank you Irene, for
testing my translations


