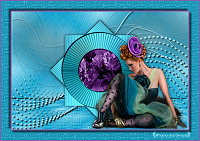
|


This tutorial is from Angela das Graças who I thank for
letting me translate their tutorials.

Original here


Tubes


Material

Many thanks to the creators of
these materials


Plugins
Medhi / Weaver
Simples / Diamonds
Unlimited 2.0 / Special Effects 1 / Square Bumps

You can find these plugins on the websites of:
Renée
Cloclo

You can also find this tutorial translated into these languages:
(Click on the flag)


SCRIPT
Notes:
> Open the material / Duplicate (shift+d) / Close the originals
> Change the blend mode of the layers to match their colors.
> In older versions of PSP, Mirror Horizontal=Mirror / Mirror Vertical=Flip /
Pick tool=deformation
> Open the masks in psp and
minimize
>Adjust the size of the tubes according to your images
*
You will need a character tube
Choose two colors from your tube: a dark one for the foreground and
a light one for the background
Open a new transparent image measuring 800x600px
Paint with one of the colors
Selections - select all
Copy the character tube and paste it into the selection
Select none
Effects - Image Effects - Seamless Tiling - default
Adjust - Blur - Gaussian Blur=15
Effects - Plugins - Mehdi - Weaver
Effects - Plugins - Unlimited 2 - Special Effects
1 - Square Bumps
Effects - Plugins - Simple - Diamonds
Prepare a Linear gradient with the two colors
chosen at the beginning
Add new layer
Paint with the gradient
Layers - New Mask layer - From Image - Mask [Masker118 mpd©Designs]
Merge group
Drop shadow: 3 3 60 3 black
Add new layer
Paint with white color
Layers - New Mask Layer - From Image - Mask[maskanyway_camerontags]
Merge Group
Layers - Properties - Opacity=50%
Drop shadow: 3 3 60 3 black
Layers - Duplicate
Image - Mirror - Mirror Horizontal
Merge down
Copy the tube character - paste as new layer
Adjust the size
Drop shadow of your choice
Image - Add borders - 6px - light color
Image - Add borders - 6px - dark color
Image - Add borders - 50px - different color
Select this 50px border with the Magic Wand - Tolerance/feather=0
Paint with the gradient
Effects - Plugins - AAA Frame - Photo Frame
Select none
Image - Add borders - 2px - light color
Image - Add borders - 2px - dark color
Finish:
Place signatures
Merge all
Save as jpeg
*
Thank you Irene for testing my translations


|


