|

This tutorial is by Amparito Silva, whom I thank for letting me translate his
tutorials.

Original HERE

Tubes


Thank you so much
Material

Thank you very much to the creators of these
materials
Plugins
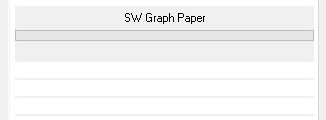
BKG Designers sf10 III/ SW Graph
Paper
Flaming Pear / Flexify2
Mura's meister / pole Transform
You can find these plugins on the websites of:
Renée
Cloclo
You can also find this tutorial translated into these languages:
(Click on the flag)


SCRIPT
Notes:
> Open the material / Duplicate (shift+d) / Close the originals
> Change the blend mode of the layers to match their colors.
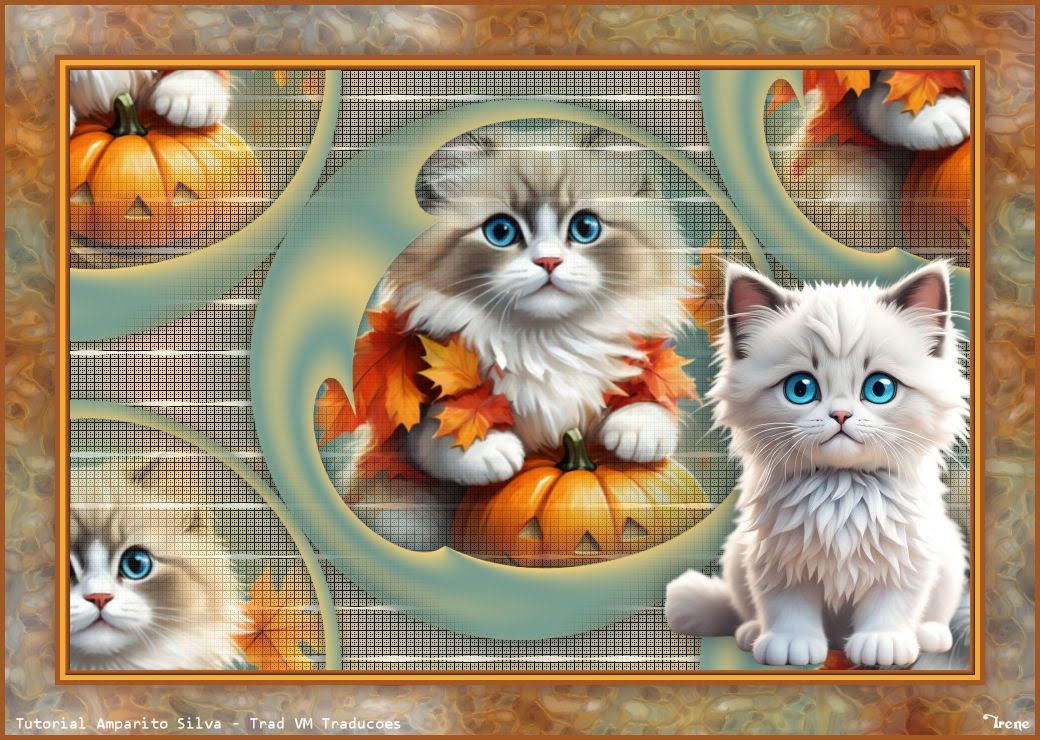
> In older versions of PSP Mirror Horizontal=Mirror
/ Mirror Vertical=Flip / Pick tool=deformation
1. Open the mask in PSP and minimize
2. Colors:
3. Open a new transparent image with 900x600px
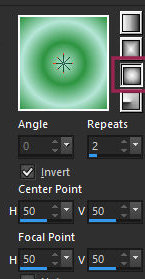
4. Prepare this Sunburst gradient
5. Paint the image with the gradient
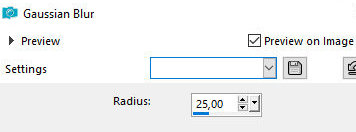
6. Adjust / blur / Gaussian Blur=25
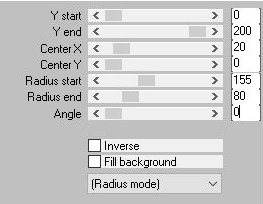
7. Effects / Plugins / Mura's Meister / pole Transform
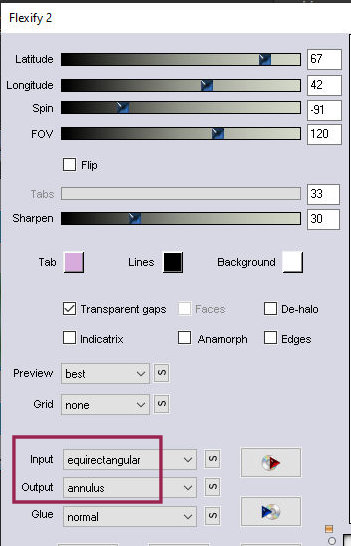
8. Effects / plugins / Flaming Pear / Flexify2
9. Add new layer
10. Layers / Arrange / Send to Bottom
11. Paint with the gradient
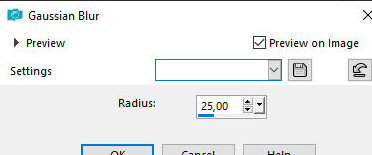
12. Adjust / Blur / Gaussian blur=25
13. Effects / plugins / unlimited 2 / BKG designers sf10 III / Sw
Graph Paper
14. Close the top layer (click on the eye)
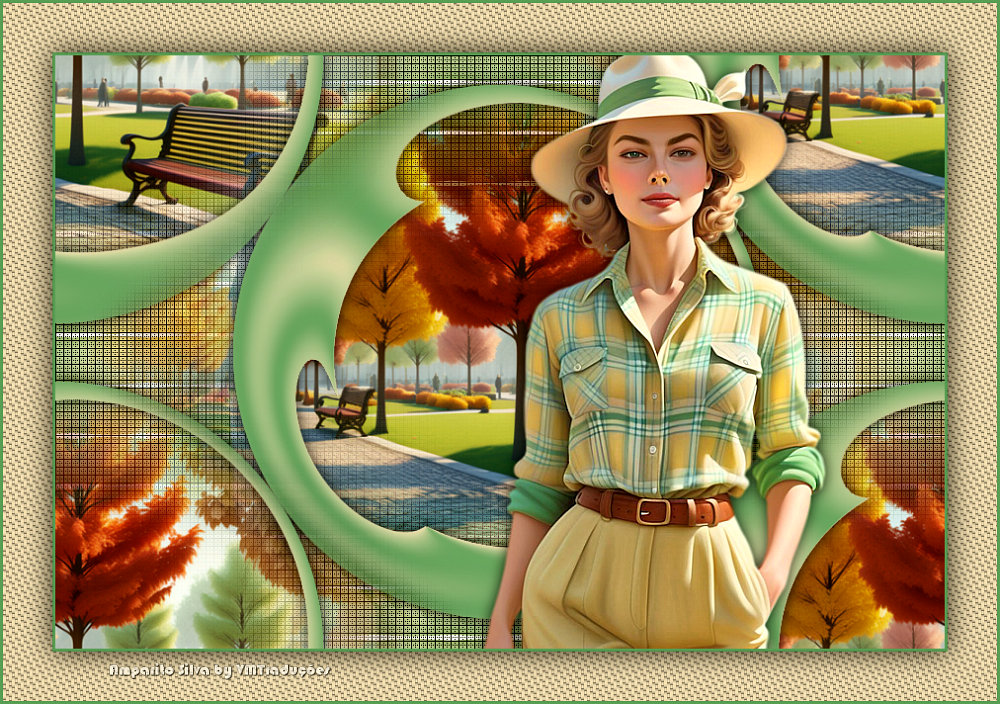
15. Activate the background layer
16. Add new layer
17. Paint with white color
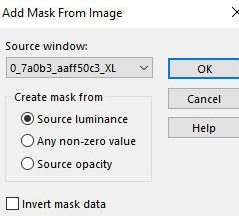
18. Layers / New mask layer / From image / Mask
[0_7a0b3_aaff50c3_XL]
19. Effects / Edge Effects / Enhance
20. Merge Group
21. Layers / Properties / blend mode: Overlay or
other that matches
22. Drop shadow: 0 0 80 20 black
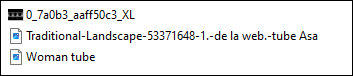
23. Copy the mixed tube 1.-de la web.-tube Asa]
and paste as new layer
24. Do not move
25. Layers / Properties / blend Mode: Overlay or
other that matches - default
26. Paste the mixed [Traditional-Landscape-53371648-1.-de
la web.-tube Asa] again as a new layer
27. Image / Resize: 90% - all layers unchecked
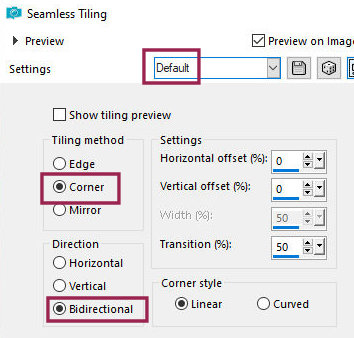
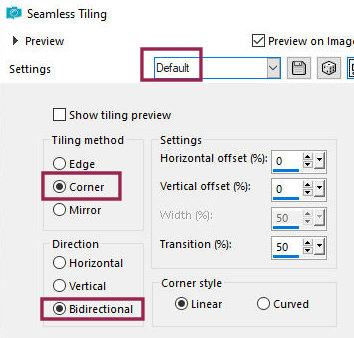
28. Effects / Image Effects / Seamless Tiling -
default
29. Open the top layer (click on the eye)and activate
30. Image / Resize: 90% - all layers unchecked
31. Effects / Image Effects / Seamless Tiling - default
32. Layers / Duplicate - 2 times (you will have 3 equal layers)
33. Merge Down - 2 times
34. Drop Shadow same as before
35. Copy the main tube and paste as a new layer
36. Adjust the size
37. Drop Shadow same as before
38. Add a border of your choice
39. Add the signatures
40. Merge all
41. Save as jpeg
*
Obrigada à irene por testar minhas traduções

|