|
Step 1.
Original Colors
Open a new transparent image with
900x600px
Prepare a linear gradient
Color the image with this gradient
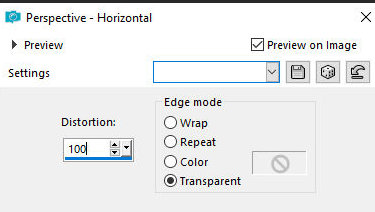
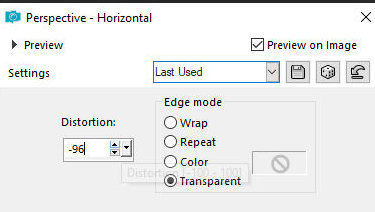
Effects - Geometric Effects - Perspective Horizontal
Effects - Geometric Effects -
Perspective horizontal - new configuration
Effects - Plugins - Mura's Meister -
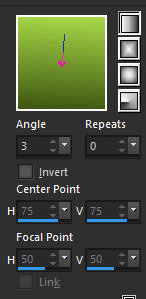
Pole Transform
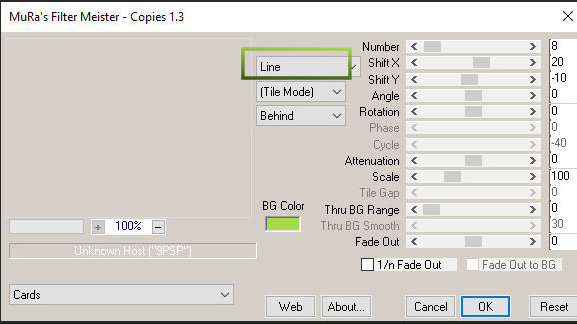
Effects - Plugins - Mura's Meister
Copies
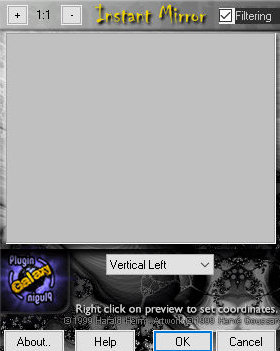
Effects - Plugins - Plugin Galaxy -
Instant Mirror
Add new layer
Step 2
Paint the layer with the gradient
Layers - Arrange - Send to Bottom
Layers - Duplicate
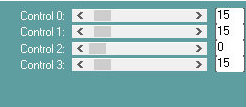
Effects - Plugins - Carolaine and Sensibility -
CS-BRetangles
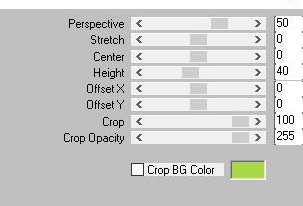
Effects - Plugins - Mura's meister
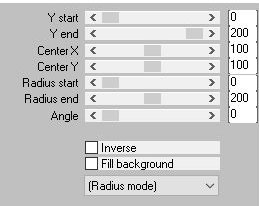
Perspective Tiling
Activate the Magic Wand - Feather=75
Click on the transparent part of the layer
Press Delete on the keyboard 5 times
Select none
Activate the background layer
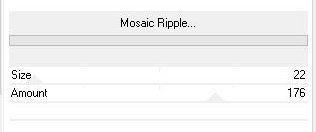
Effets - Plugins - VM Distortion - Mosaic Ripple
Effects - Edge Effects - Enhance
Step 3
Continue on the layer
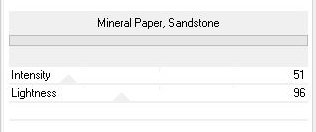
Effects - Plugins - Unlimited 2 - Paper Textures -
Mineral Paper, Sandstone
Activate the Copy of Raster 2 layer (second
layer from the bottom)
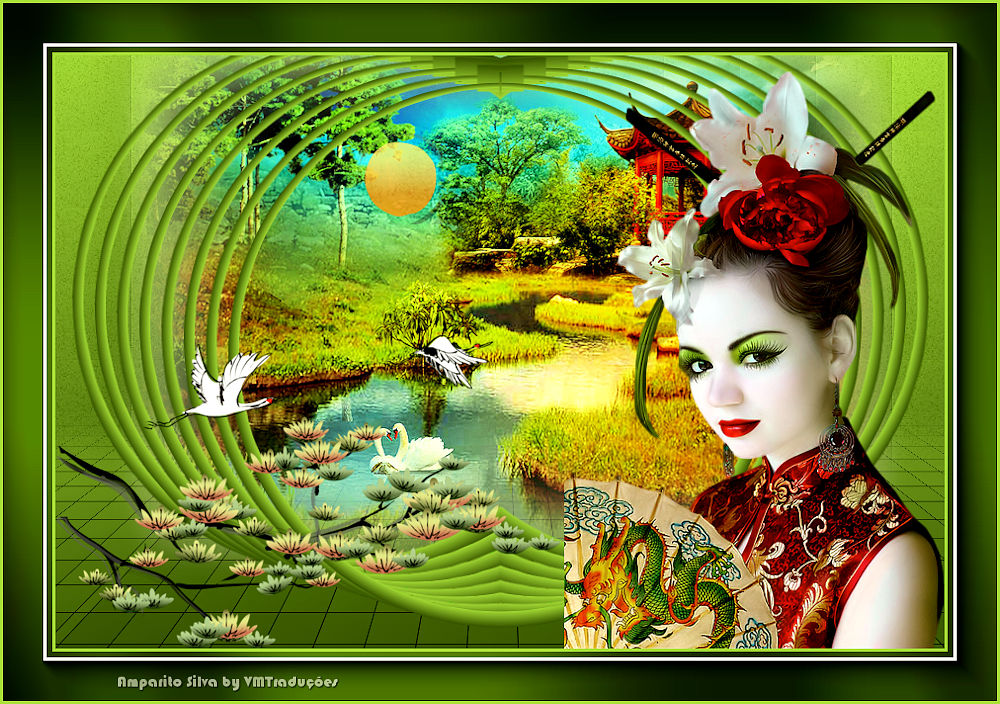
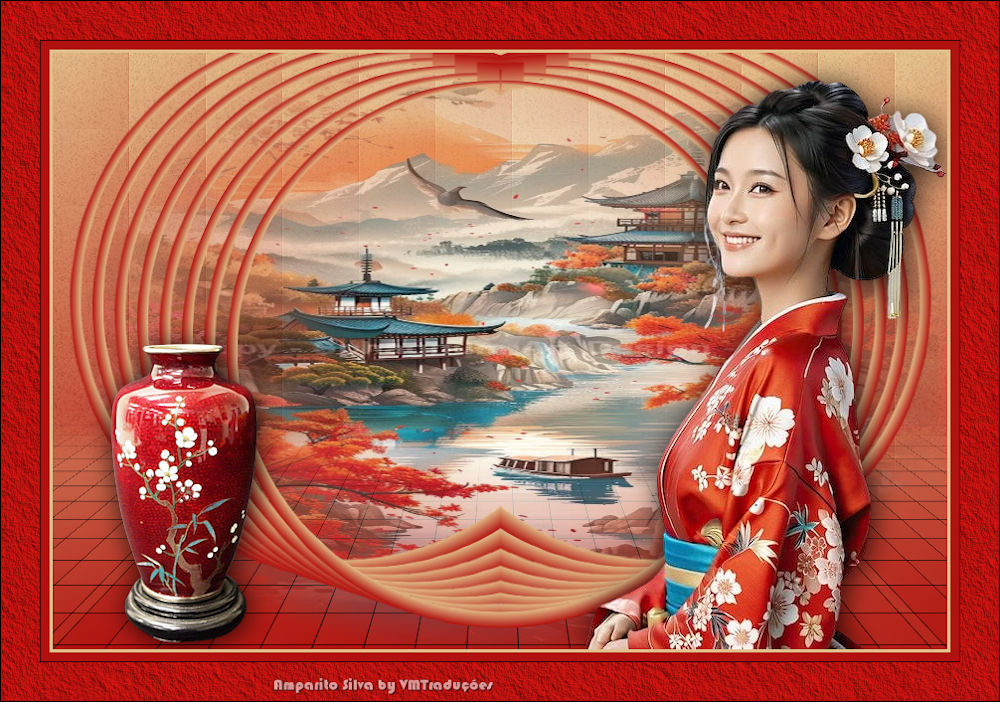
Copy the landscape [Mina@.4056.mist.paesaggio05.16] and
paste it as a new layer
Adjust the size
Position according to the model or as you prefer
Activate the Top Layer
Copy the tube [0_5c7cd_99fbb883_XL - copy] and paste it
as a new layer
Adjust the size
Position according to the model or as you prefer
Step 4
Copy the tube [22b84ef24fb9 - copy (2)] and paste as a
new layer
Position it at the bottom left as per the model
Activate the Selection Tool and select the moon image
Edit/Cut (this option will erase the image
and save it in memory)
Select none
Paste as a new layer
Position as per the model
Adjust the size if necessary
Merge visible
Add a border of your choice
Place the signatures
Merge all
Save as jpeg
|