|

This tutorial is by Amparito Silva, whom I thank for letting
me translate his tutorials.

Original here

Tubes

Material

Many thanks to the creators of these materials
Plugins
TYMOES
SIMPLE
MURA’S MEISTER
You can find these plugins on the websites of:
Renée
Cloclo
You can also find this tutorial translated into these languages:
(Click on the flag)


SCRIPT
Notes:
> Open the material / Duplicate (shift+d) / Close the originals
> Change the blend mode of the layers to match their colors. > In
older versions of PSP Mirror Horizontal=Mirror / Mirror Vertical=Flip
/ Pick tool=deformation
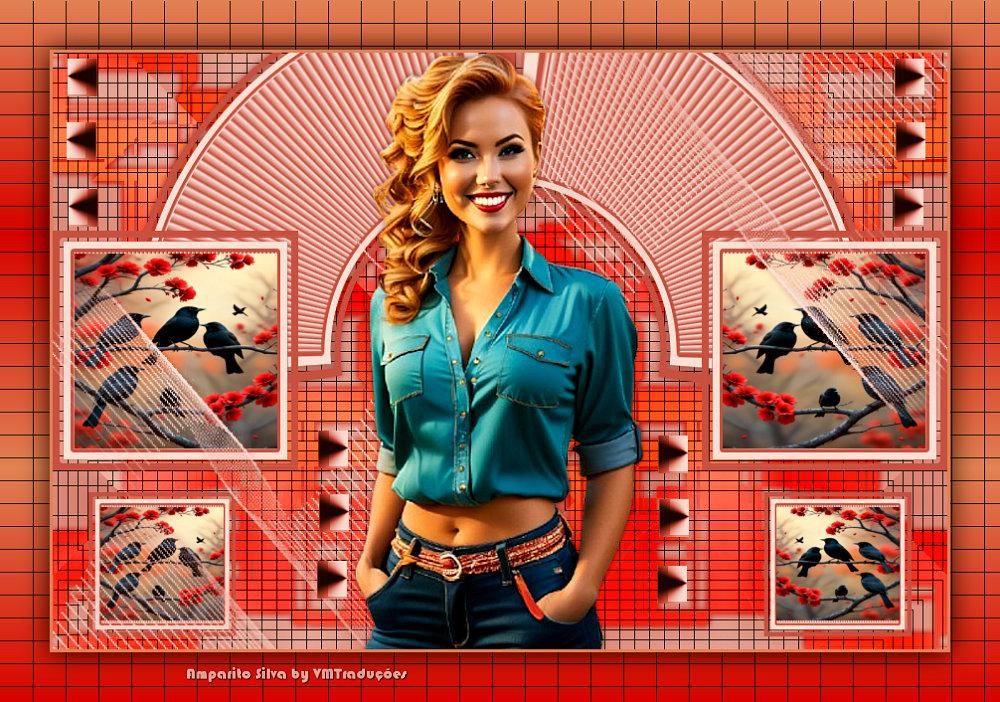
1. Open the mask in the psp and minimize
2. Open the background [Asa.-fondo] / duplicate (shift+d) / Close
the original
N.T. You can color it according to your colors and using the method
of your preference
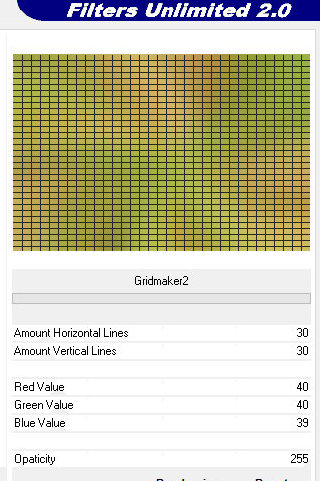
3. Effects / plugins / unlimited 2 / Tymoes / Gridmaker2
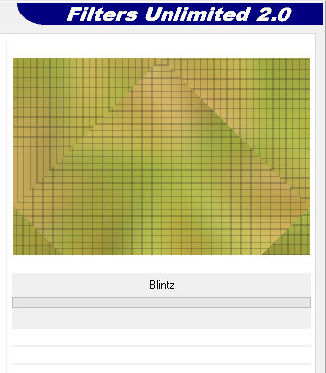
4. Effects / plugins / unlimited 2 / Simple / Blintz
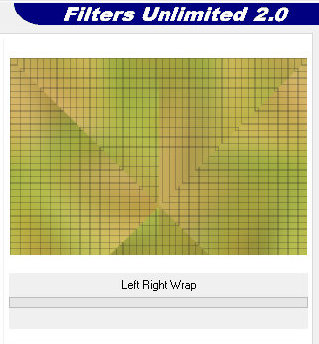
5. Effects / plugins / unlimited 2 / Simple / Left Right Wrap
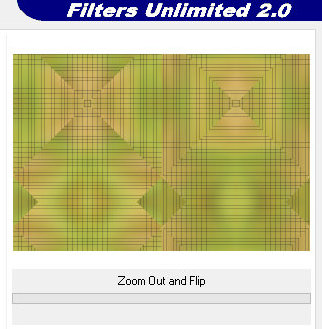
6. Effects / plugins / unlimited 2 / Simple / Zoom Out and Flip
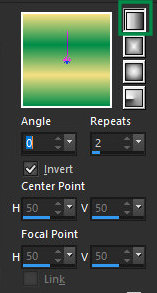
7. Add new layer
8. Paint with this gradient
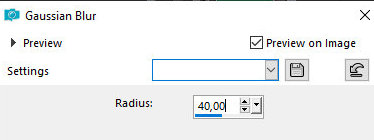
9. Adjust / Blur / Gaussian Blur=40
10. Layers / New mask Layer / From image / Mask [maskreflection10_camerontags]
- INVERT MARKED

11. Effects / Edge Effects / Enhance
12. Merge Group
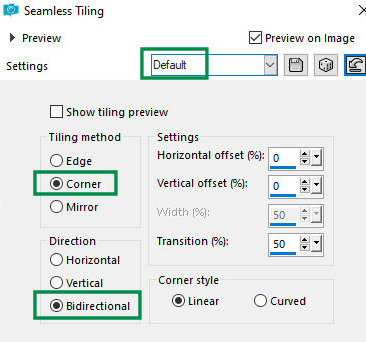
13. Effects / Image Effects / Seamless Tiling
14. Drop Shadow: 0 0 60 10 #10361c
15. Layers / Properties / Blend Mode: Overlay or another that
matches
16. Copy the tube [Asa.-cuadros] and paste it as a new layer
(colorize it according to your colors)
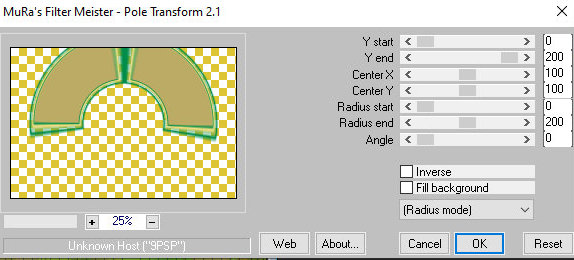
17. Effects / plugins / Mura's meister / pole Transform
18. Drop Shadow the same as before
19. Copy the tube [Asa.-cuadros] again and paste it as a new layer
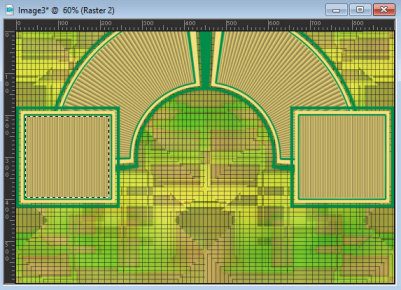
20. With the Selection Tool (type mode=rectangle) Select the inside
of the frame as shown in the print
20b. Add a new layer
21. Copy the misted landscape tube and paste it into the selection
22. Layers / Duplicate
23. Image / Mirror / Mirror Horizontal
24. Merge Down
25. Select none
26. Copy the tube [Asa.-quaadro pequeño] and paste it as a new layer
27. Position it below the left frame as per the model
28. Layers / Duplicate
29. Image / Mirror / Mirror Horizontal
30. Copy the landscape again
31. Repeat the same procedure above to place the misted in the two
small frames.
32. Copy the tube [decomask] and paste it as a new layer
33. Copy the tube [Asa.-deco botones] and paste it as a new layer
34. Move it up a bit
35. Copy the main tube and paste it as a new layer
36. Adjust the size
37. Drop Shadow the same as before
38. Add a border of your choice
39. Add the signatures
40. Merge All
41. Save as jpeg

|