|

This tutorial is from Amparito Silva who I thank for
letting me translate their tutorials.

Original here

Tubes

Material

Many thanks to the creators of
these materials
Plugins
VM Extravaganza - Mehdi - AL [Lines]
- VM Instant Art - Mura's Meister - Nik Software
You can find these plugins on the websites of:
Renée
Cloclo
You can also find this tutorial translated into these languages:
(Click on the flag)


SCRIPT
Notes:
> Open the material / Duplicate (shift+d) / Close the originals
> Change the blend mode of the layers to match their colors.
> In older versions of PSP, Mirror Horizontal=Mirror / Mirror Vertical=Flip /
Pick tool=deformation
> Open the masks in psp and
minimize
>Adjust the size of the tubes according to your images
*
Colors:
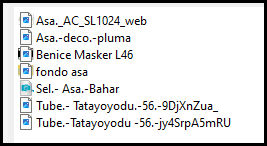
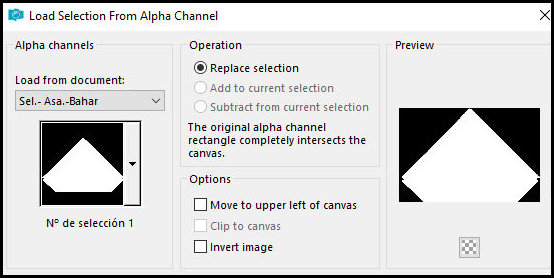
Open the alpha channel [Sel.- Asa.-Bahar] - Duplicate (shift+d) -
Close the original
Select all
Copy the image [fondo asa] and paste it into the selection
Select none
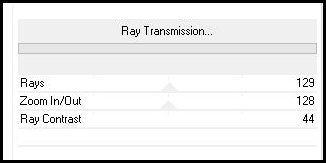
Effects - plugins - Unlimited 2 - VM Extravaganza - Ray Transmission
Effects - Plugins - Mehdi - Weaver
Effects - Edge Effects - Enhance
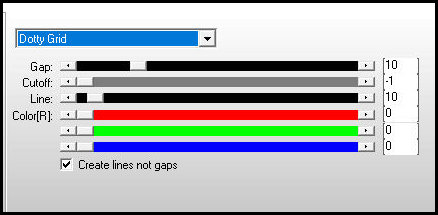
Effects - plugins - AP [Lines] - Lines SilverLining
Add new layer
Paint with the foreground color
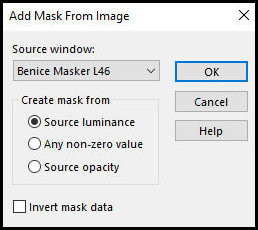
Layers - New Mask layer - From image - Mask [Benice Masker L46]
Effects - Edge Effects - Enhance
Merge Group
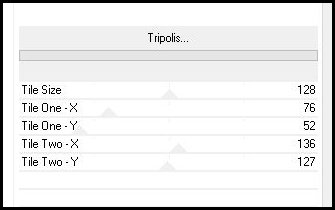
Effects - Plugins - Unlimited 2 - VM Instant Art - Tripolis
Drop Shadow: 0 0 60 15 black
Layers - Properties - Blend Mode: Overlay or another that matches
Selections - Load selection from alpha channel - Selection #1
Activate the background layer
Selections - Promote selection to layer
Layers - Arrange - Bring to top
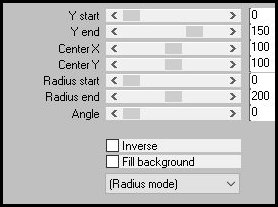
Effects - plugins - Mura's meister - Pole Transform
Drop Shadow as before
Layers - Properties - Blend Mode: Luminance (L)
Select none
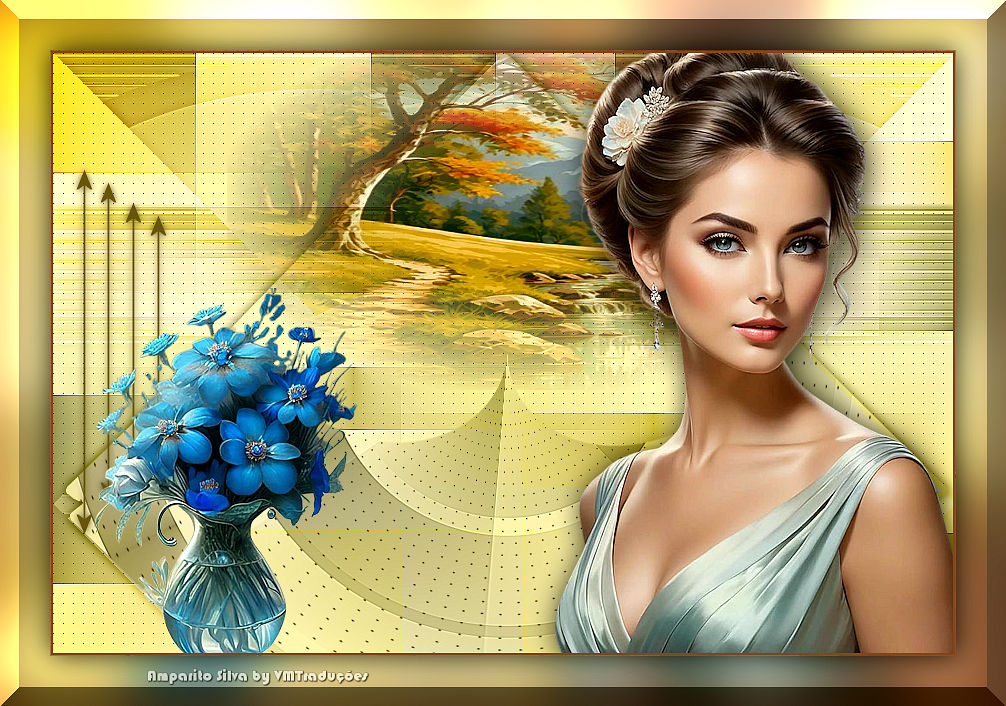
Copy the misted landscape tube [Asa._AC_SL1024_web] and paste as a
new layer
Image - Resize: 60% - all layers unchecked (reduce according to your
tube)
Position according to the model
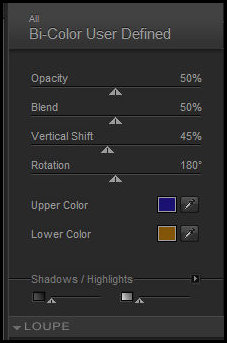
Effects - Plugins - Nik Software - Bi-Color User Defined
Layers - Arrange - move down
Activate the top layer
Copy the main tube [Tube.- Tatayoyodu.-56.-9DjXnZua_] and paste as a
new layer
Adjust the size according to your tube
Position according to the model
Drop Shadow as before
Copy the floral tube [Tube.-Tatayoyodu -56.-jy4SrpA5mRU] and paste
as a new layer
Adjust the size
Position according to the model
Copy the tube deco [Asa.-deco.-pluma] and paste as a new layer
Add a border of your choice
Add the signatures
Merge all
Resize if necessary
Save as jpeg
*
Thank you Irene for testing my
translations

|