|
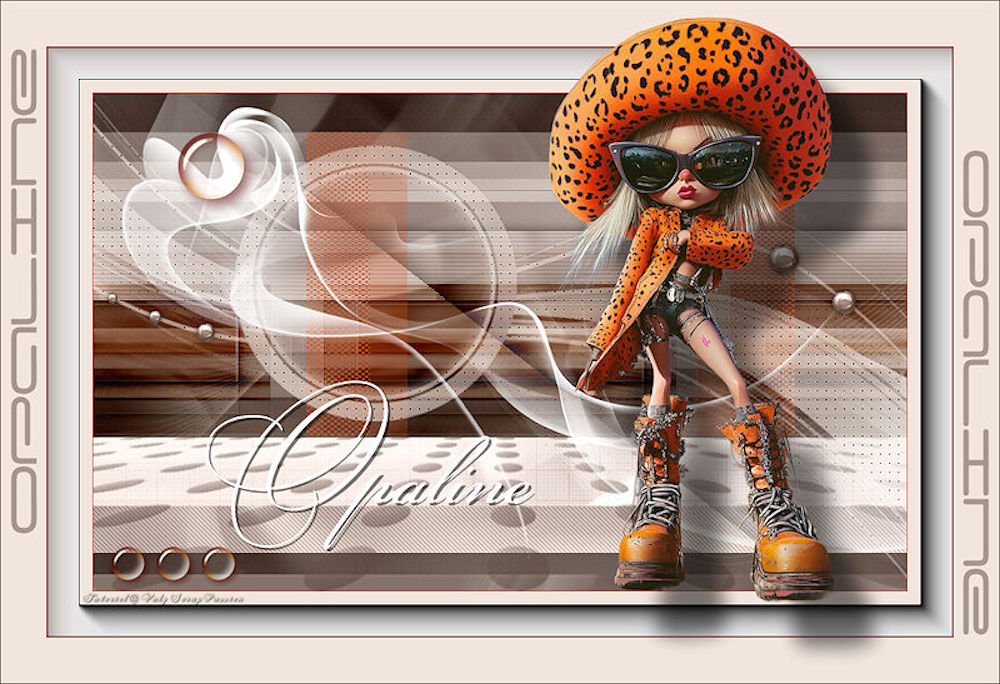
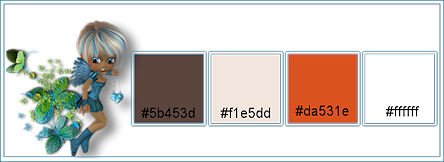
(imagem original)
Este tutorial é de Valy Scrap Passion a quem agradeço por me deixar traduzir seus tutoriais.
Material
AAA Frames - Foto Frame - AP[Distort] - Carolaine & Sensibility - Refield - Toadies - VM Extravaganza - Unlimited 2
ROTEIRO 1 Abra o arquivo Alpha [Alpha-Opaline-VSP] Duplique (shift+d) - Feche o original Cores: Foreground: #5b453d - Background: #f1a5dd
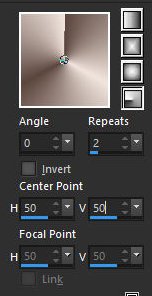
Pinte a imagem com este gradiente
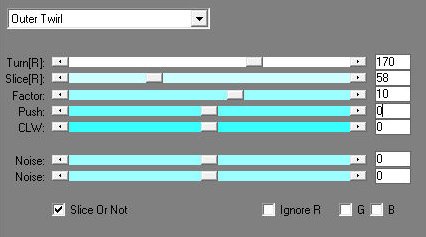
Effects - Plugins - AP [Distort] - Distort-Sliced Turn
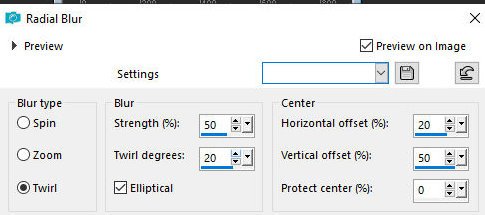
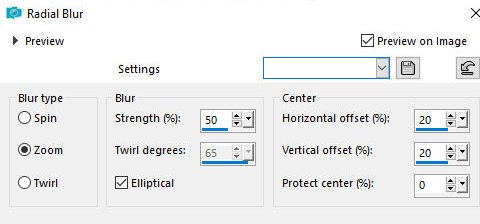
Adjust- Blur - Radial Blur
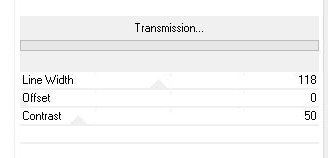
2 Layers - Duplicate Image - Mirror - Mirror Horizontal Image - Mirror - Mirror Vertical Layers - Properties - Opacity: 50% Merge down Effects - Plugins - Unlimited 2 - VM Extravaganza - Transmission [118 0 50]
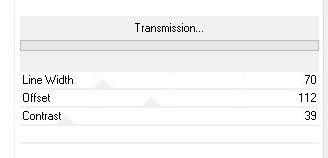
Repita Transmission com esta outra configuração [70 112 39]
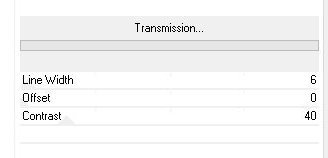
3 Selections - Load selection from alpha channel - Selection 1 Selections - Promote selection to layer Selections Load selection from alpha channel - Selection 2 Selections - promote selection to layer Effects - plugins - Unlimited 2 - VM Extravaganza - Transmission [ 6 0 40]
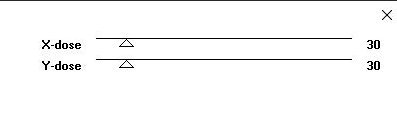
Select none Drop Shadow: 0 0 60 20,00 - preto Ative a layer do meio - Promoted Selection Effects - Plugins - Toadies - What are you? [30 30 ]
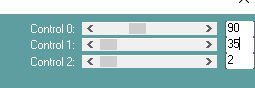
4 Ative a layer inferior - Raster 1 Selections - Load selection from alpha channel - Selection 3 Selections - Promote selection to layer Selections - Load selection from alpha channel - Selection 4 Selections - Promote selection to layer Effects - plugins - Carolaine & Sensibility - CS-LDots [ 90 35 2]
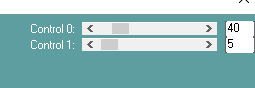
Drop shadow: 0 0 60 20 preto Select none Ative a layer abaixo - Promote selection 2 Effects - Plugins - Carolaine & Sensibility - CS_DLines [40 5]
5 Ative a layer superior Selections - Load selection from alpha channel - Selection 5 Drop Shadow: 0 0 60 60 preto Select none
6 Adicione nova layer Pinte com a cor 1 Layers - Load Mask from alpha channel - Mask [VSP288] Merge group
7 Edit - Copy Special - Copy Merged Cole como nova layer Image - Flip - Flip Horizontal Adjust - Blur - Radial Blur [zoom 50 x 20 20 0]
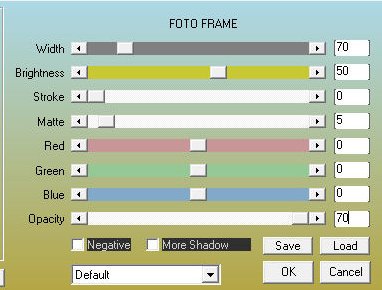
Effects - Plugins - AAA Frames - Foto Frame [70 50 0 5 0 0 0 70]
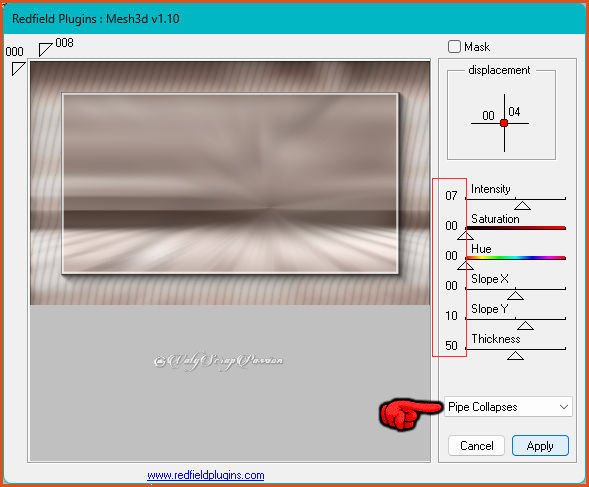
8 Selections - Load selection from alpha channel - Selection 6 Effects - Plugins - Redfield - Mesh 3D
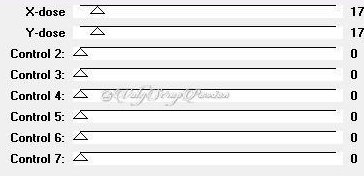
Select none Image - Resize: 50% - aspect to ratio e all layers desmarcados Effects - Plugins - Toadies - What are you? [17 17]
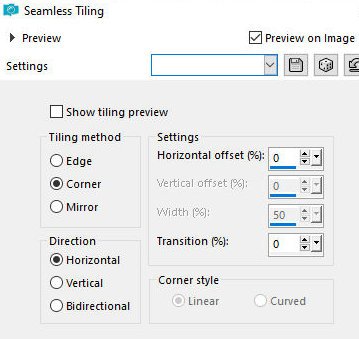
Effects - Image Effects - Seamless Tiling [cor-hor-0 0]
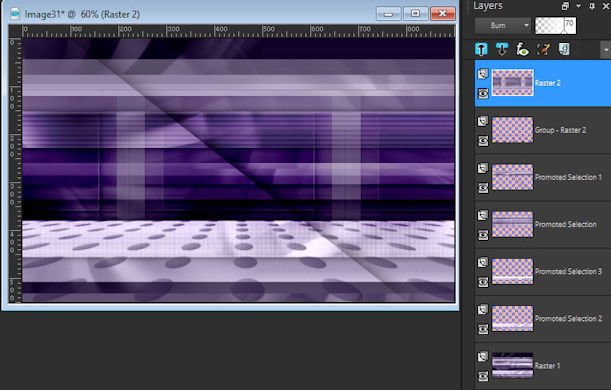
Blend Mode: Burn resultado 1
9 Copie o tube [Deco1-Opaline-VSP] Cole como nova layer Pick Tool (K) X=236 Y=43 Pressione M
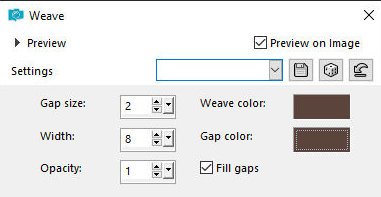
10 Adicione nova layer Pinte com a cor 2 Layers - Load Mask from alpha channel - Mask [Narah-Mask-1199] Merge group Image - Mirror - Mirror horizontal Pick Tool (K) - X=0 Y=(-14) Pressione M Effects - Texture Effects - Weave [2 8 1 cor 1 cor 1 - x]
Adjust - Sharpness - Sharpen
11 Copie o tube [Deco2-Opaline-VSP] Cole como nova layer Pick Tool (K) - X=16 Y=138 Pressione M Drop Shadow: 0 0 60 10 preto
12 Copie o tube [Deco3-Opaline-VSP] Cole como nova layer Pick Tool (K) - X=18 Y=43 Pressione M
13 Adicione nova layer Pinte com a cor 4 Layers - Load Mask from alpha channel - Mask [Mask-0415-05] Layers - Duplicate Merge group Image - Mirror - Mirror Vertical Layers - Arrange - Move down - 2 vezes
14 Copie o tube [Titre1-Opaline-VSP] Ative a layer superior Cole como nova layer Pick Tool (K) - X=125 Y=318 Pressione M
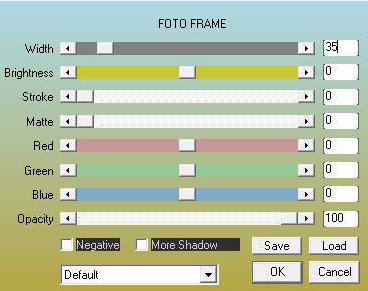
15 Image - Add borders - 1px - cor 3 Image - Add borders - 50px - Cor 2 Effects - Plugins - AAA Frames - Foto Frame [35 000000 100]
Image - Add borders - 1px- cor 3 Image - Add borders - 50px - cor 2
16 Copie o tube [Renee-TUBES-octobre-2025-30] Copie e cole como nova layer Image - Resize: 65% - all layers desmarcado Image - Mirror - Mirror Horizontal Pick Tool (K) X=605 Y=17 Pressione M Drop Shadow: 52 45 50 30 preto
17 Copie o tube [Titre2-Oplaine-VSP] Ative a layer superior Cole como nova layer
18 Image - Add borders - 1px - cor 1 Image - Resize: 900px(width) - all layers marcado Adjust - Sharpness - Sharpen
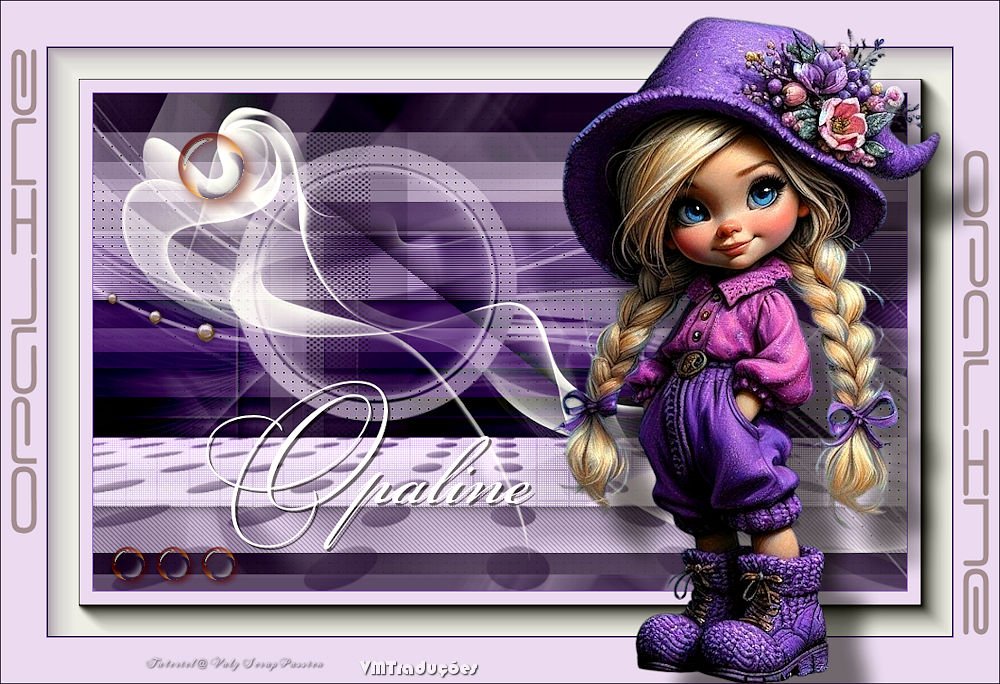
19 Coloque os créditos Merge all Salve como jpeg
|