|
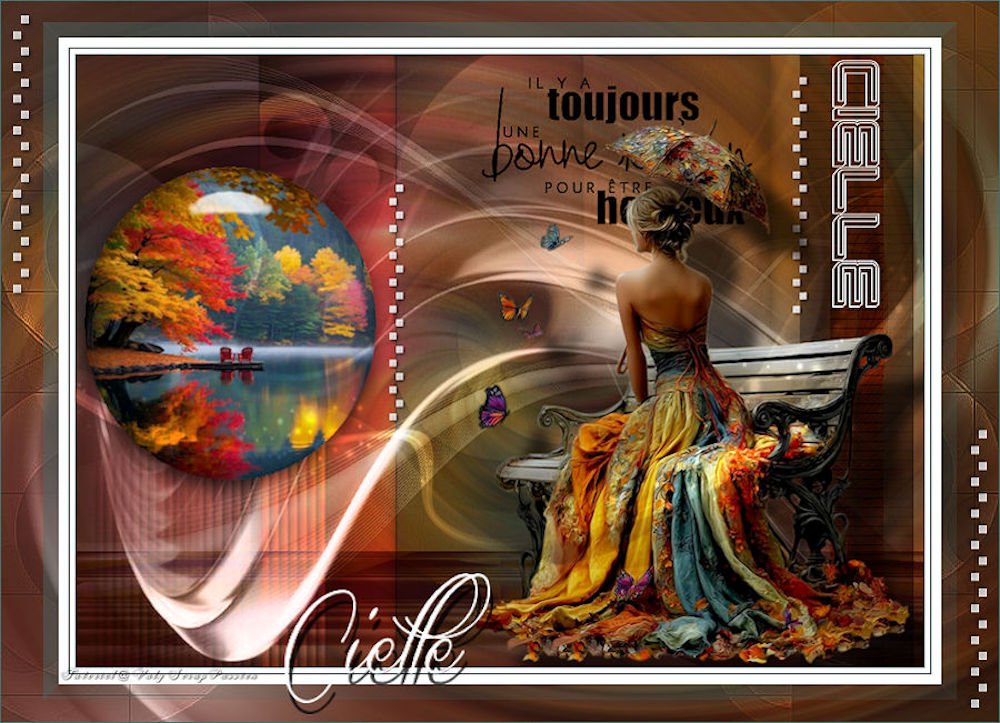
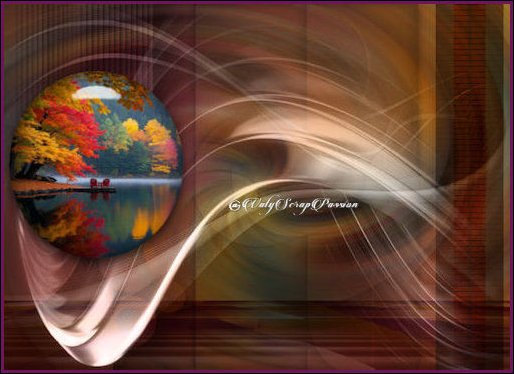
(imagem original de Valy)
Este tutorial é de Valy Scrap Passion a quem agradeço por me deixar traduzir seus tutoriais.
Material
Eye Candy 5: Impact - AP [Lines] - Mura's meister - VanDerLee - Unlimited 2
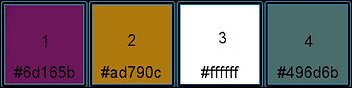
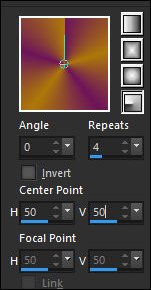
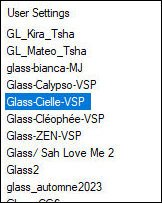
ROTEIRO Material: 1 tube feminino 1 imagem jpg paisagem 1 imagem jpg abstracta *** Clique duas vezes no prest [Glass-Cielle-VSP] para instal rno plugins *** 1. Cores: Cor 1 no foreground e cor 2 no background 2. Abra o alpha channel [Alpha-cielle-VSP] - duplique (shift+d) 3. Feche o original 4. Prepare este gradiente e pinte a imagem com ele
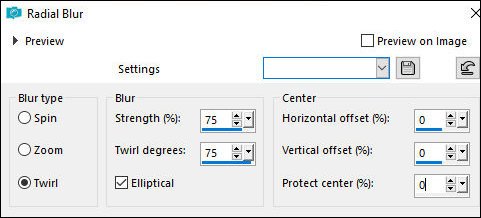
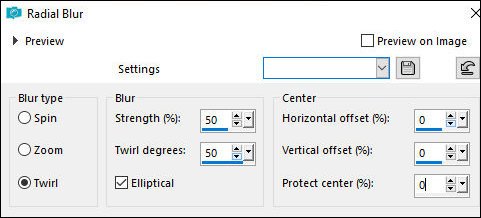
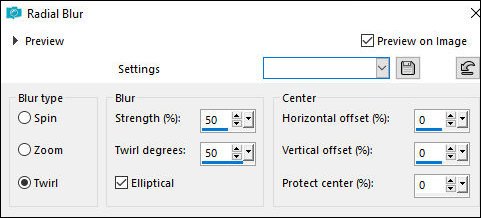
5. Adjust - Blur - Radial Blur
6. Adicione nova layer 7. Selections - Select all 8. Copie o tube [5017-woman-LB Tubes 9. Cole na seleção 10. Select none 11. Effects - Image Effects - Seamless Tiling - default 12. Adjust - Blur - Radial Blur
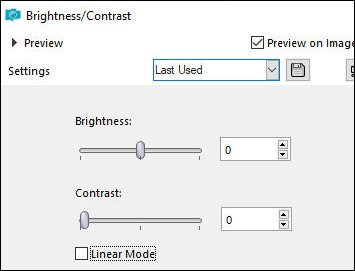
13. Adjust - Brightness and Contrast - Brightness Contrast
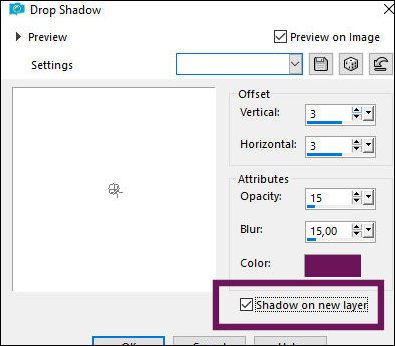
14. Merge down 15. Copie [image 1 pinterest] 16. Cole como nova layer 17. Objects - Align - Left 18. Blend mode: Multiply 19. Drop Shadow: 3 3 15 15 cor 1 -SHADOW ON NEW LAYER MARCADO
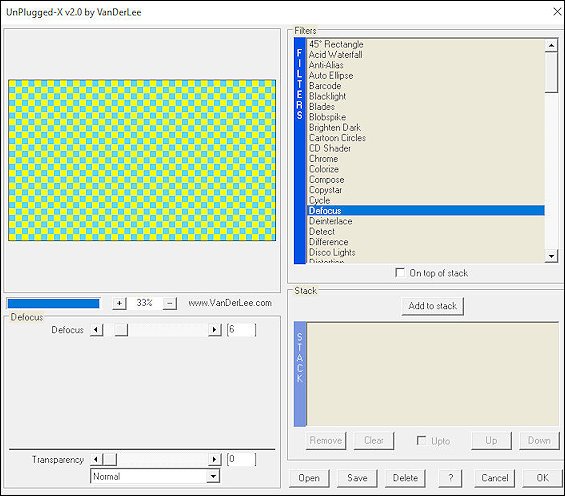
20. Copie [Image 2 pinterest] 21. tive a layer superior de seu trabalho 22. Cole como nova layer 23. Pick Tool (K) X=337 Y=0 Pressione M 24. Blend Mode: Multiply 25. Drop shadow: 2 2 20 20 preto - Shadow desmarcado 26. Ative a layer de fundo - Rster 1 27. Selections - Load selection from alpha channel - Selection 1 28. Selections - Promote selection to layer 29. Select none 30. Effects - Plugins - VanDerLee - Unplugged-X - Defocus
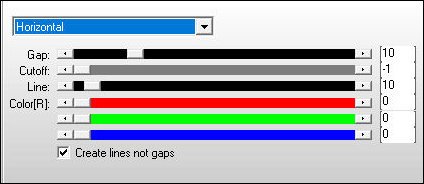
31. Effects - plugins - AP[Lines] - SilverLining
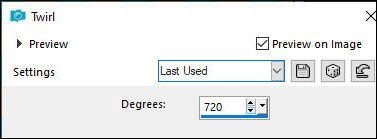
32. Blend mode: Overlay 33. Layers - Duplicate 34. Effects - Distortion Effects - Twirl
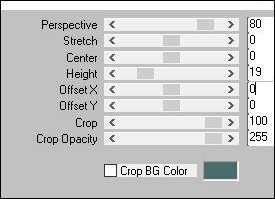
35. Blend mode: Soft Light 36. Ative a layer superior 37. Adicione nova layer 38. Pinte com o gradiente 39. Layers - Load Mask from alpha channel - Mask [Narah-mask-0386] 40. Merge group 41. Effects - Plugins - Mura's Meister - Perspective Tiling
42. Blend mode: Multiply 43. Adicione nova layer 44. Selections - Load selection from alpha channel - Selection 2 45. Copie image [paysage-cielle] 46. Cole na seleção 47. Effects - Plugins - Eye Candy 5: Impact - Glass - Preset [glass-Cielle-VSP]
48. Select none 49. Pick Tool (K) - X=(-21) Y=99 Pressione M 50. Adicione nova layer 51. Pinte com a cor 3 52. Layers - Load Mask from alpha channel - mask [Ildiko-Designs-Created@mask] 53. Merge Group 54. Effects - Edge Effects - Enhance 55. Blen mode: Soft Light 56. Adicione nova layer 57. Pinte com a cor 3 58. Layers - Load mask from alpha channel - Mask [Narah-Mask-1413] 59. Merge group 60. Blend mode: Luminance (L) 61. Layers - Arrange - Move down - 2 vezes 62. Resultado1
63. Ative a layer de fundo - Raster 1 64. Selections - Load selection from alpha channel - Selection 3 65. Selections - Promote selection to layer 66. Select none 67. Blend mode: Dodge 68. Copie [WordArt] 69. Ative a layer superior 70. Cole como nova layer 71. Pick Tool (K) - X=419 Y=7 72. Blend mode: Multiply 73. Copie o tube [Deco1-Cielle-VSP] 74. Cole como nova layer 75. Pick Tool (K) X=332 Y=23 Pressione M 76. Copie o tube [5017-woman-LBTubes] 77. Cole como nova layer 78. Image - Resize: 85% - all layers desmarcado 79. Pick Tool (K) X=391 Y=65 Pressione M 80. Drop shadow: 45 48 65 20 preto 81. Adicione nova layer 82. Pinte com a cor 3 83. Layers - Load Mask from alpha channel - Mask [VSP217] 84. Merge Group 85. Image - Mirror - Mirror Horizontal 86. Blend mode: Overlay 87. Merge Visible 88. Copie 89. Cole como nova imagem 90. Borda - 1px - cor 4 91. Borda - 5px - cor 3 92. Borda - 2px - cor 4 93. Borda - 10px - cor 3 94. Image - Resize: 85% - all layers desmarcado 95. Copie 96. Retorne para seu trabalho principal 97. Cole como nova layer 98. Ative a layer de baixo - Merged 99. Adjust - Blur - Radial Blur
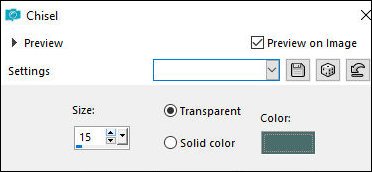
100. Copie o tube [Deco2-Cielle-VSP] 101. Cole como nova layer 102. Ative a layer superior (Raster 1) 103. Effects - 3D Effects - Chisel
104. Copie o tube [Deco3-Cielle-VSP] 105. Cole como nova layer 106. Copie o tube [Titre1-Cielle-VSP] 107. Cole como nova layer 108. Pick Tool (K) X=255 Y=516 Pressione M 109. Copie o tube [Titre2-Cielle-VSP] 110. Cole como nova layer 111. Pick Tool (K) X=750 Y=63 Pressione M 112. Borda - 1px - cor 4 113. Image - Resize: 900px (width) - all layers marcado 114. Adjust - Sharpness - Sharpen 115. Coloque os créditos 116. Salve como jpeg
|