|
(Imagem original de Valy Scrap Passion)
(minha versão)
Este tutorial é de Valy Scrap Passion a quem agradeço por me deixar traduzir seus tutoriais.
Material
Flaming Pear - Toadies - Unlimites - AFS Import
ROTEIRO Imagens: 1 tube feminino * Material
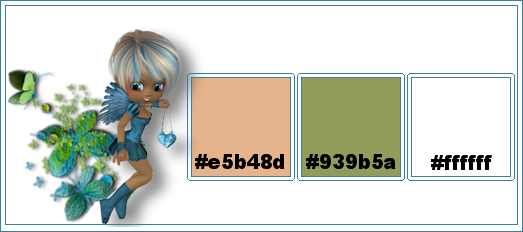
* * 1 Cores:
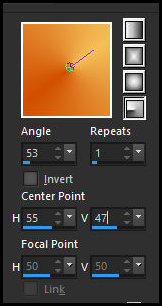
Abra o arquivo alpha channel [Alpha-Anaya-VSP] Duplique (shift+d) / Feche o original Pinte com a cor 3 2 Adicione nova layer Coloque a cor 1 no foreground e a cor 2 no background Prepare um gradiente Radial
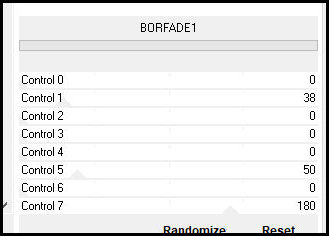
Pinte a layer com esse gradiente Layers / New Mask layer / From imagem / Mask [VSP286] Merge Group Merge Down 3 Adicione nova layer Pinte com a cor 3 Layers / New Mask Layer / From Image / Mask [VSP287] Effects / Edge Effects / Enhance Merge group Blend Mode: Luminance (L) 4 Adicione nova layer Pinte com a cor 1 Layers / New Mask layer / From Image / Mask [ildiko@create0051-mask] Effects / Edge Effects / Enhance Merge Group Effects / Image Effects / Seamless Tiling - default 5 Adicione nova layer Pinte com a cor 2 Layers / New Mask Layer / From Imagem / Mask [NarhsMasks 1828] Effects / Edge Effects / Enhance Merge Group 6 Selections / Load selection from alpha channel / Selection 1 Effects / Plugins / Unlimited 2 / AFS Import / BORFADE1 - default
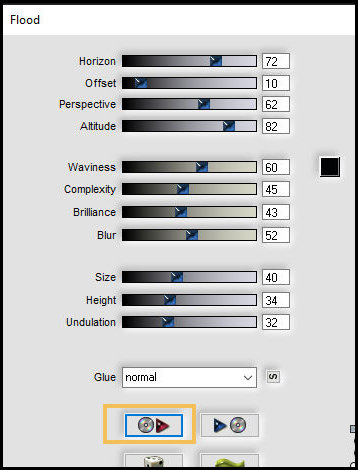
Select none Effects / Plugins / Flaming Pear / Flood (Observação: Clique na seta vermelha e localize e selecione o preset [Flood-Anaya-VSP] na pasta de materiais ou configure manualmente conforme o print)
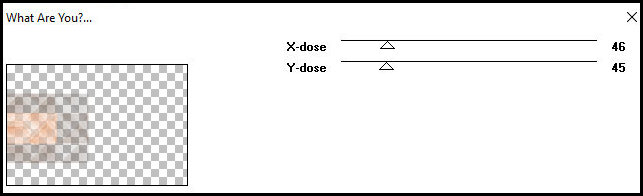
Layers / Duplicate Merge down 7 Selections / Load selection from alpha channel / Selection 2 Effects / Plugins / Unlimtied 2 / Background Designers IV / sf10 Slice N Dice Selections / Pomote selection to layer Select none Effects / Plugins / Toadies / What are you?
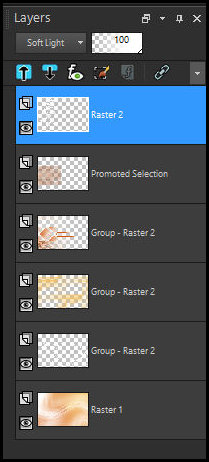
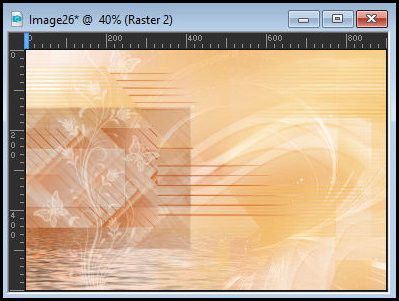
Drop Shadow: 2 2 50 4 preto 8 Copie [pochoir10_franiemargot] Cole como nova layer Ative a Pick tool(K) e configure: X=16 y=(-36) Blend Mode: Soft Light Layers / Duplicate As layers devem estar assim:
A imagem deverá estar assim:
9 Copie [Deco1-Anaya-VSP] Ative a 4ª layer a partir de baixo Cole como nova layer Objects / Align / Left 10 Copie [Deco2-Anaya-VSP] Ative a layer superior Cole como nova layer Ative a Pick Tool (K)e configure: X=16 Y=169 Pressione M 11 Copie [Deco3-Anaya-VSP] Ative a layer superior Cole como nova layer Ative a Pick Tool (K) e configure: X=316 Y=235 Pressione M 12 Copie [Deco4-Anaya-VSP] Ative a layer superior Cole como nova layer Ative a Pick Tool (K) e configure: X=146 Y=175 Pressione M 13 Copie [Deco5-Anaya-VSP] Ative a 4ª layer a partir de baixo Cole como nova layer Ative a Pick tool (K) e configure: X=242 y=(-8) Pressione M 14 Copie [EmmaMulderBergstra9 franiemargot] Ative a layer superior Cole como nova layer Image / Resize: 115% all layers desmarcado Image / MIrror / Mirror Horizontal Adjust / One Step Photo Fix (opcional) Adjust / Sharpness / Unsharp Mask - default Ative a PicK Tool (K) e configure: X=267 Y=38 Pressione M Drop shadow: 11 21 35 33,00 preto 15 Copie [Titre1-Anaya-VSP] Ative a layer superior Cole como nova layer Ative a Pick Tool(K) e configure; X=773 Y=60 Pressione M Drop Shadow: 26 (-14) 36 1 cor 1 16 Copie [Titre2-Anaya_VSP] Ative a layer superior Cole como nova layer Ative a Pick Tool (K) e configure: X=229 Y==541 Pressione M Opacity: 62% 17 Merge visible Copie (ficará na memória) Image / Add borders / 10px / cor 3 Selections / Select all Image / add borders / 60px / cor 3 Selections / Promote selection to layer Mantenha a seleção 18 Ative a layer abaixo Selections / Invert Adicione nova layer Cole na seleção a imagem que está na memória Select none Opacity: 50% 19 Ative a layer superior Drop shadow: 10 10 40 20,00 preto Drop shadow: -10 -10 40 20,00 preto 20 Copie [Deco6-Anaya-VSP] Ative a layer superior Cole como nova layer 21 Copie [Deco7-Anaya-VSP] Ative a layer superior Cole como nova layer 22 Image / Add borders / 10px / cor 3 Image / Add borders / 1px / cor 2 23 Image / Resize: 800px (width) - all layers marcado Adjust / Sharpness / Sharpen 24 Coloque os créditos Merge all Salve como jpeg
|