| Abra a mask
[NarahsMasks_1723] / Duplique (shift+d) / Feche o
original
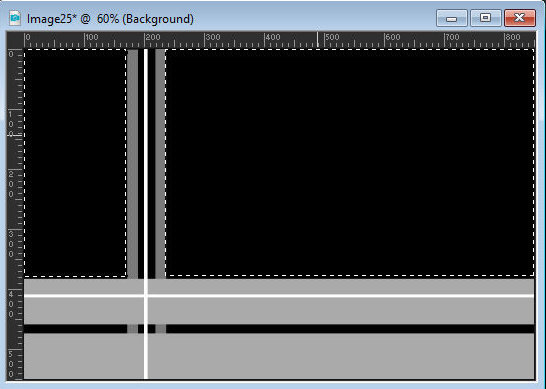
Selecione os retângulos pretos com a
Magic Wand (tolerance/feather=0)
conforme o print
Adicione nova layer
Copie a imagem [103834__mark-kalpin-landscape-painting-early-fall-mixed-forest-yellow-birch-lake-lotus_p]
Cole na seleção
Select none
Abra o arquivo alpha [seleccion_canal_alpha]
/ Duplique (shift+d) / Feche o original
Ative sua imagem principal
Selections / Selection
from alpha channel / Selection 1
Adicione nova layer
Pinte com a cor #3e4e1a
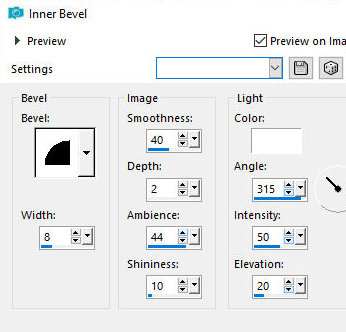
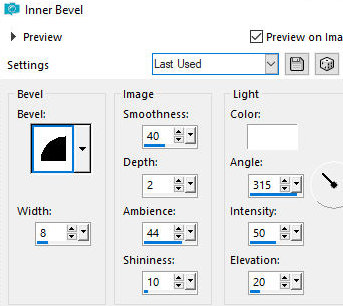
Effects / 3D Effects /
Inner Bevel
bv2 8 40 2 44 10 br 315
50 20
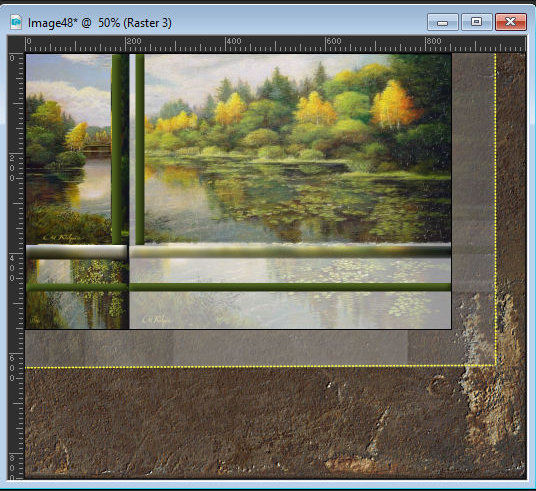
Ative a Selection tool
(selection type=rectangle)
Selecione conforme o
print
Pressione Delete
Select none
Adicione nova layer
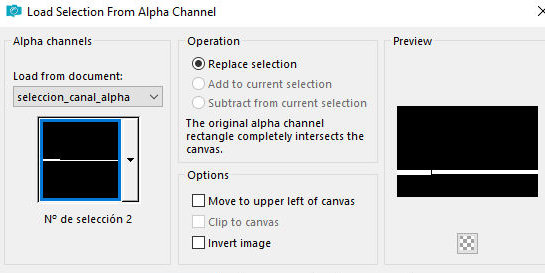
Selections / Load
selection from alpha channel / Selection 2
Copie novamente a
imagem [103834__mark-kalpin-landscape-painting-early-fall-mixed-forest-yellow-birch-lake-lotus_p]
Cole na seleção
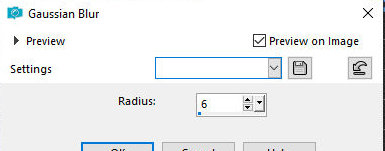
Adjust / Blur / Gaussian Blur: 6
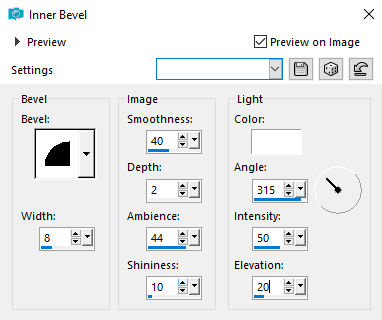
Effects / 3D Effects / Inner Bevel -
igual anterior
Adicione nova layer
Selections / Load selection from alpha
channel / Selection 3
Pinte com a cor #3e4e1a
Effects / 3D Effects / Inner Bevel -
igual anterior
Select none
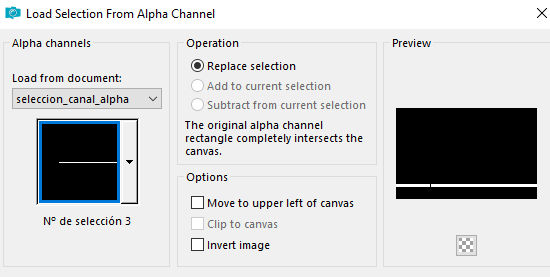
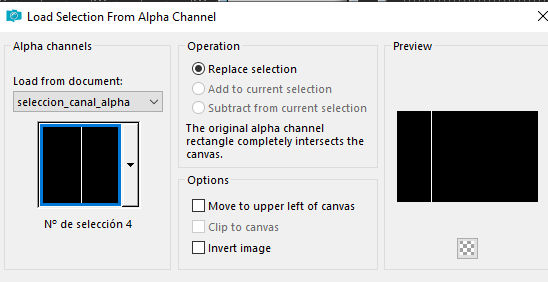
Selections / Load selection from alpha
channel / Selection 4
Ative a layer inferior
Effects / 3D Effects / Inner Bevel -
igual anterior
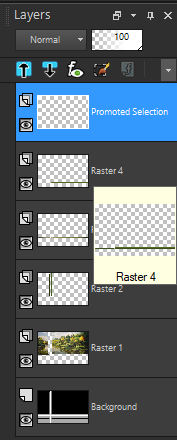
Selections / Promote selection to
layer
Layer / Arrange / Bring to top
Select none
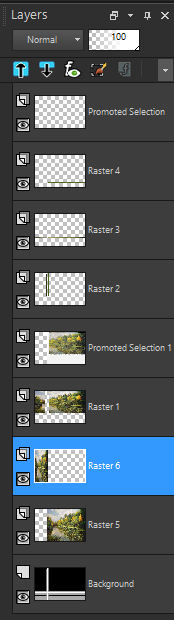
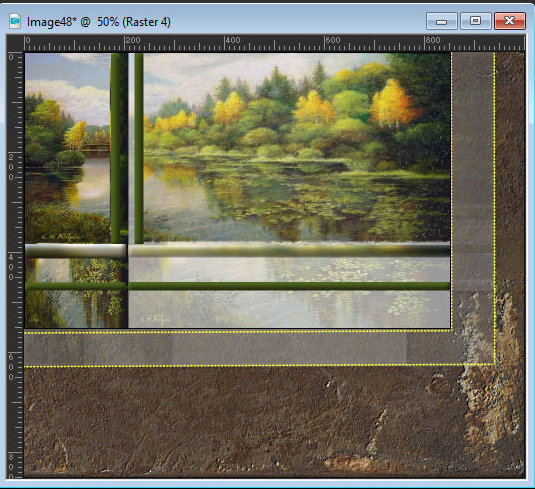
As layers estarão assim
Ative a layer Raster 1
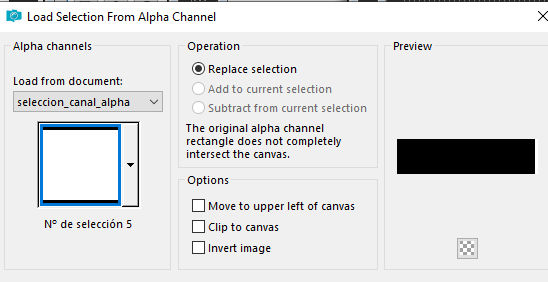
Selections / Load selection from alpha
channel / Selection 5
Selections / Promote selection to
layer
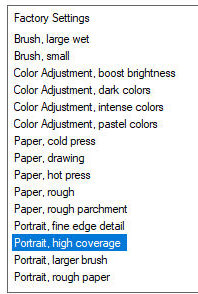
Effects / Plugins / Snap Art / Water
Colors - Preset [Portrait, high coverage]
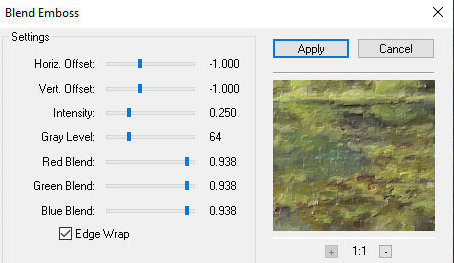
Effects / Plugins / FM Tile Tools /
blend Emboss
Layers / Properties / Opacity: 60% (ou
de acordo com sua imagem)
Mantenha a seleção
Ative a layer de fundo
Adicione nova layer
Copie novamente a imagem da paisagem
Cole na seleção
select none
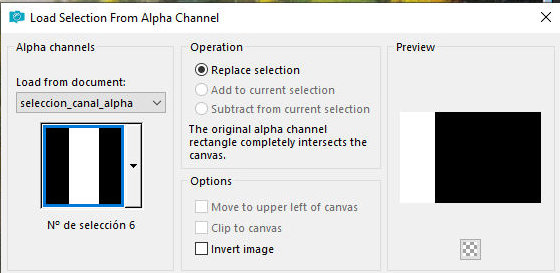
Selections / Load selection from alpha
channel / Selection 6
Adicione nova layer
Copie a imagem de paisagem novamente e
cole na seleção
Select none
As layers estarão assim:
Borda: 2px / preto
Copie (ficará na memória)
Abra uma nova imagem transparente com
1000x850px
Cole a imagem da memória com nova
layer
Objects / Align / Top
Objects / Align / Left
Ative a layer inferior
Selections / Select all
Copie a imagem [43]
Cole na seleção
Select none
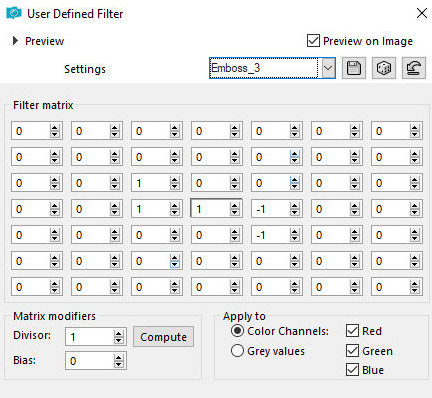
Efects / User Defined Filter / Emboss
3
Ative a layer superior
Layers / Duplicate
Ative a layer abaixo (original)
Effects / Plugins / Unlimited 2 /
Toadies / What are you?
Drop shadow: 0 0 70
20 preto
Copie a imagem [filo_amarillo]
Cole como nova layer
(se quiser, você pode colorizar de
acordo com sua imagem: Selections / Select all -
Selections / Float - Selections/ Defloat - pinte com a
cor escolhida)
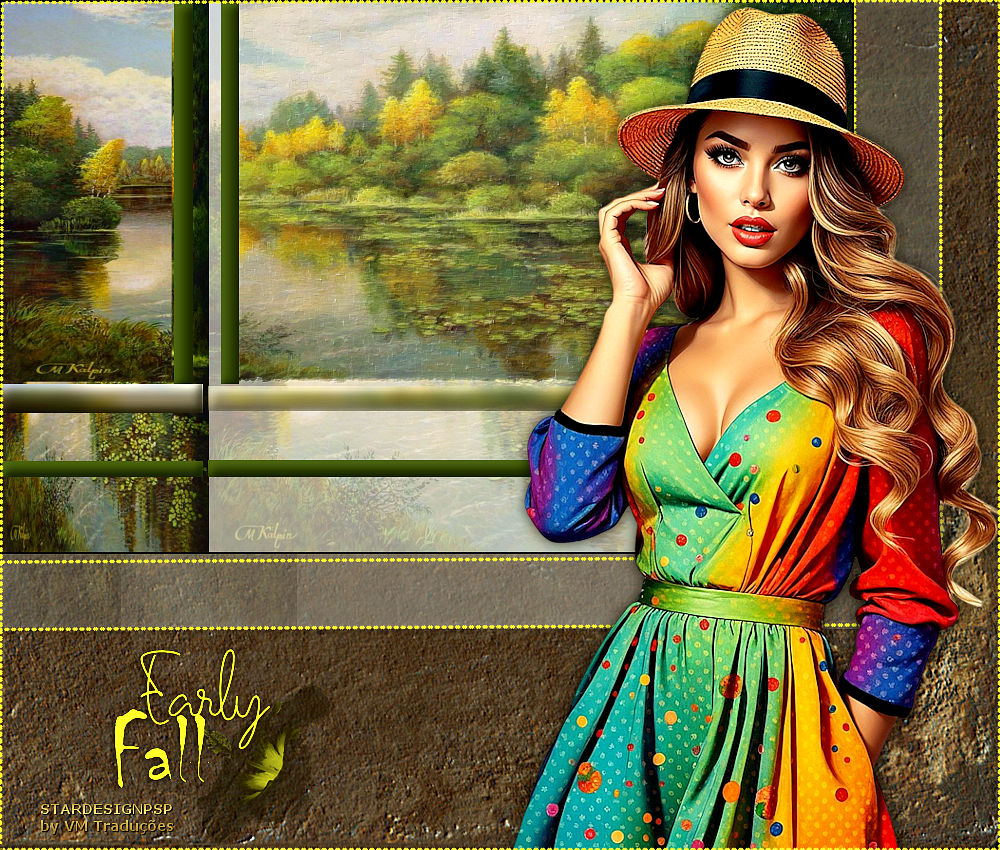
Posicione conforme o modelo
Ative a layer superior
Drop Shadow: 0 0 70
20 preto
Copie novamente a imagem [filo-amarillo]
Cole como nova layer
Posicione conforme modelo
Ative a layer superior
Copie o tube [tubtatie_28244422]
Cole como nova layer
Image / Resize: 90% - all layers
desmarcado
Image / MIrror / Mirror Horizontal
Posicione conforme modelo ou como
preferir
Adjust / Sharpness / Sharpen
Drop shadow: 0 0 70
20 preto
Copie o tube wordart
[earlyfall_wordart_3]
Cole como nova layer
Image/ Negative Image
Selections / Select all
Selections / Float - Selections /
Defloat
Pinte com a cor #ffff40 ou uma cor de
sua escolha
Select none
Drop Shadow: 1 -1 70
10 preto
Posicione conforme modelo
Copie o tube [marco_puntos]
Cole como nova layer
Coloque as assinaturas
Merge all
Salve como jpeg
|