Open the mask [NarahsMasks_1723] / Duplicate (shift+d)
/ Close the original
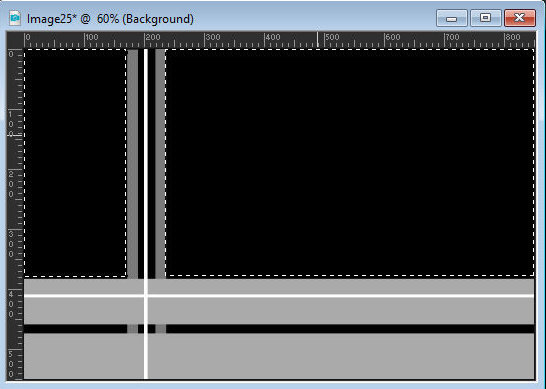
Select the black rectangles with the Magic Wand (tolerance/feather=0)
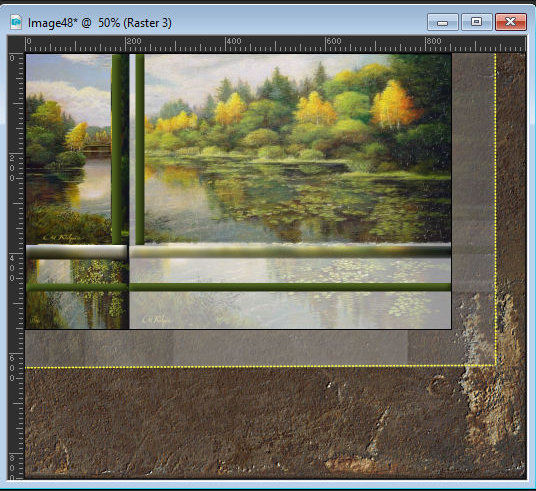
as shown in the screenshot
Add a new layer
Copy the image [103834__mark-kalpin-landscape-painting-early-fall-mixed-forest-yellow-birch-lake-lotus_p]
Paste it into the selection
Select none
Open the alpha file [seleccion_canal_alpha] /
Duplicate (shift+d) / Close the original
Activate your main image
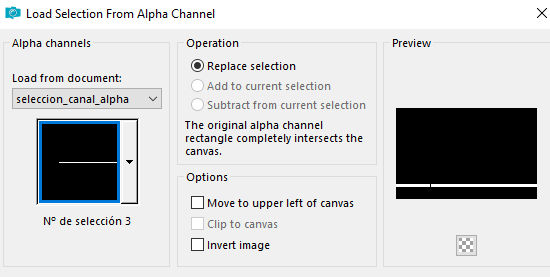
Selections / Selection from alpha channel /
Selection 1
Add a new layer
Paint with the color #3e4e1a
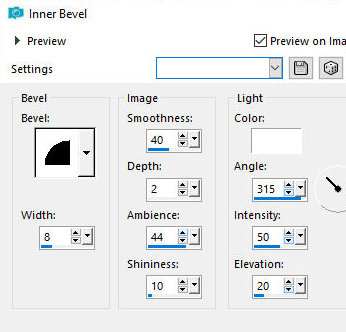
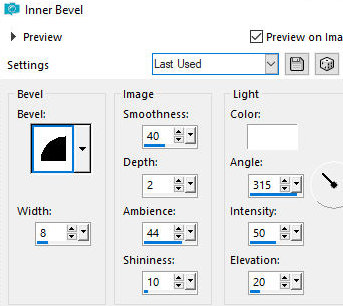
Effects / 3D Effects / Inner Bevel
bv2 8 40 2 44 10 br 315 50 20
Select none
Activate the Selection tool (selection type=rectangle)
Select according to the print
Press Delete
Select none
Add new layer
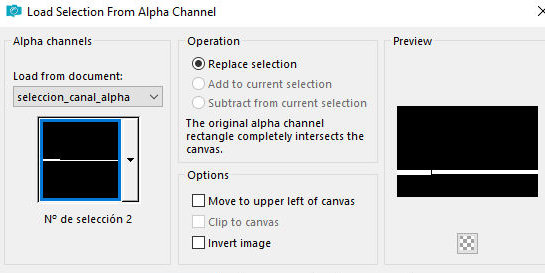
Selections / Load selection from alpha channel /
Selection 2
Copy the image again [103834__mark-kalpin-landscape-painting-early-fall-mixed-forest-yellow-birch-lake-lotus_p]
Paste into selection
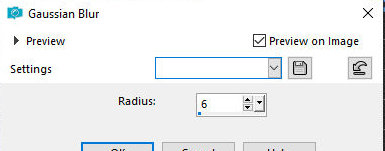
Adjust/Blur/Gaussian Blur: 6
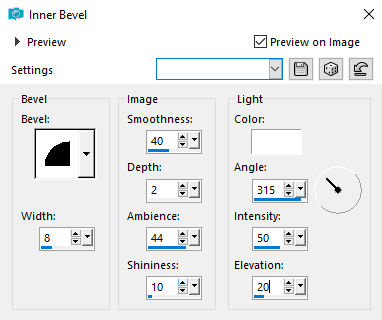
Effects / 3D Effects / Inner Bevel -
igual anterior
Add a new layer
Selections / Load selection from alpha
channel / Selection 3
Paint with the color: #3e4e1a
Effects / 3D Effects / Inner Bevel -
same as above
Select none
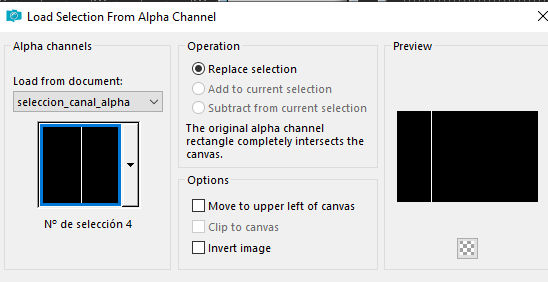
Selections / Load selection from alpha
channel / Selection 4
Activate the bottom layer
Effects / 3D Effects / Inner Bevel -
same as above
Selections / Promote selection to layer
Layer / Arrange / Bring to top
Select none
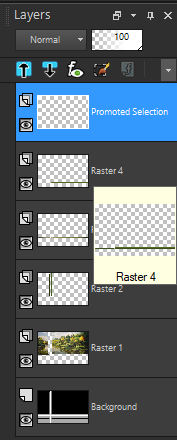
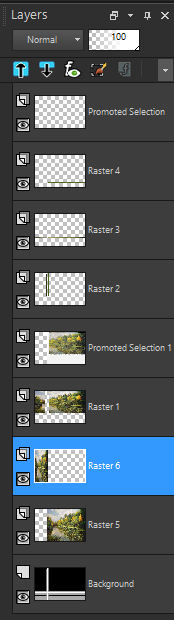
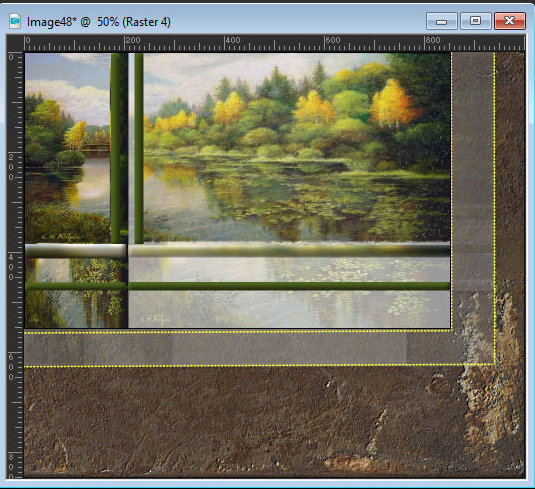
The layers will look like this:
Activate layer Raster 1
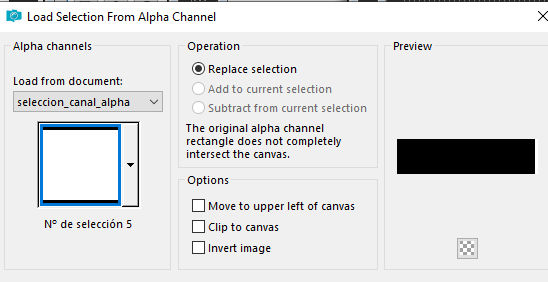
Selections / Load selection from alpha
channel / Selection 5
Selections / Promote selection to
layer
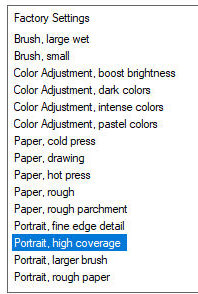
Effects / Plugins / Snap Art / Water
Colors - Preset [Portrait, high coverage]
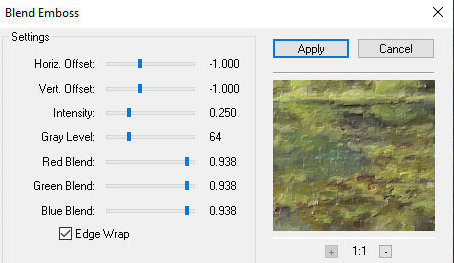
Effects / Plugins / FM Tile Tools /
blend Emboss
Layers / Properties / Opacity: 60% (or according to
your image)
Keep the selection
Activate the background layer
Add a new layer
Copy the landscape image again
Paste it into the selection
select none
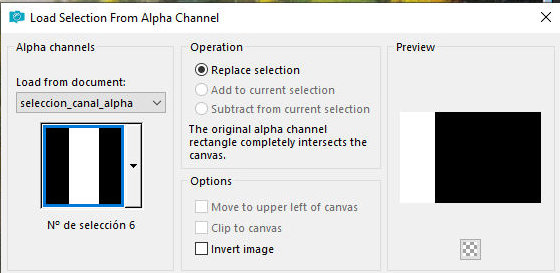
Selections / Load selection from alpha channel /
Selection 6
Add a new layer
Copy the landscape image again and paste it into the
selection
Select none
The layers will look like this:
Border: 2px / black
Copy (it will be stored in memory)
Open a new transparent image with 1000x850px
Paste the memory image with new layer
Objects/Align/Top
Objects/Align/Left
Activate the bottom layer
Selections / Select all
Copy the image [43]
Paste into selection
Select none
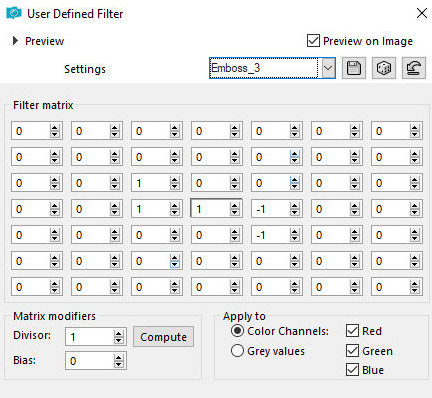
Effects / User Defined Filter / Emboss 3
Activate the top layer
Layers/Duplicate
Activate the layer below (original)
Effects / Plugins / Unlimited 2 / Toadies / What are
you?
Drop shadow: 0 0 70 20 black
Copy the image [filo_amarillo]
Paste as a new layer
(If you want, you can colorize it according to your
image: Selections / Select all - Selections / Float
- Selections / Defloat - paint with the chosen color)
Position according to the model
Activate the top layer
Drop Shadow: 0 0 70 20 black
Copy the image [filo-amarillo] again
Paste as a new layer
Position according to the model
Activate the top layer
Copy the tube [tubtatie_28244422]
Paste as a new layer
Image / Resize: 90% - all layers unchecked
Image / Mirror / Mirror Horizontal
Position according to the model or as you prefer
Adjust / Sharpness / Sharpen
Drop shadow: 0 0 70 20 black
Copy the tube wordart [earlyfall_wordart_3]
Paste as New layer
Image/Negative Image
Selections / Select all
Selections / Float - Selections / Defloat
Paint with the color #ffff40 or a color of your choice
Select none
Drop Shadow: 1 -1 70 10 black
Position as per model
Copy the tube [marco_puntos]
Paste as a new layer
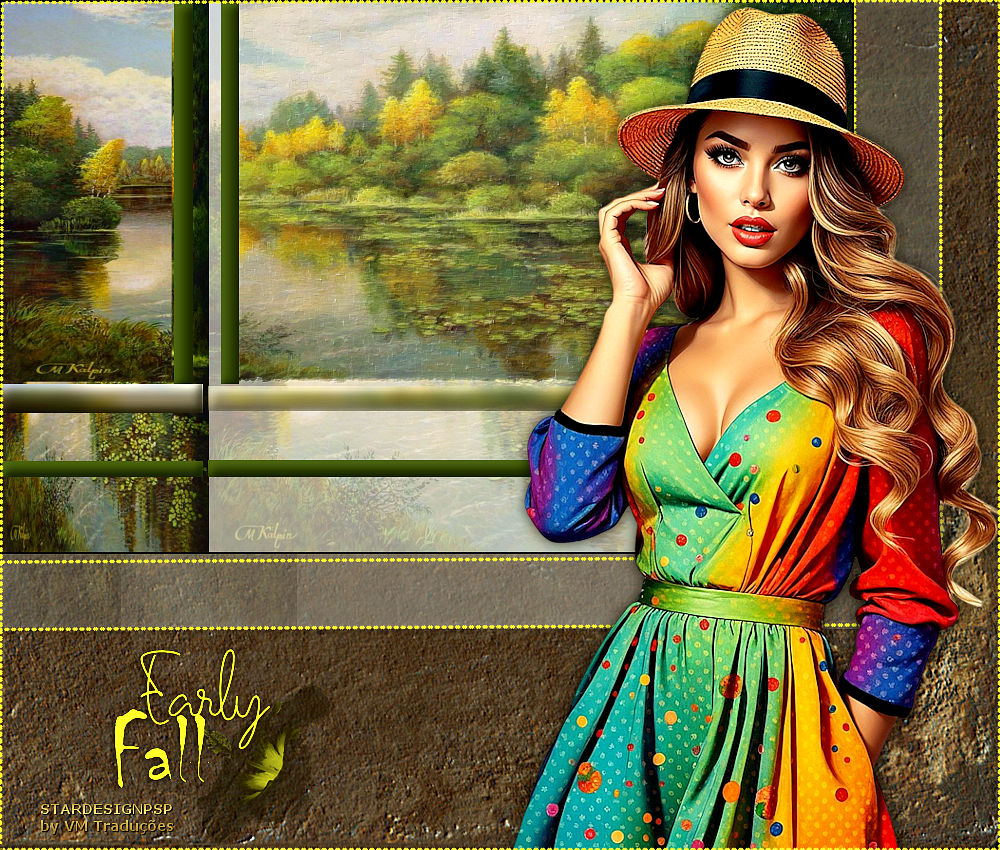
Add the signatures
Merge all
Save as jpeg |