|


This tutorial is from Natalia Raposo who I thank for
letting me translate their tutorials.

Original here


Tubes


Material

Many thanks to the creators of
these materials


Plugins
Nick Software/ Color Effects Pro
3.0
Greg's Factory Output Vol. II/ Shatter
Galaxy/ Warp 1
Galaxy/ Warp 2
Carolaine and Sensibility
Unlimited 2.0/ Buttons & Frames

You can find these plugins on the websites of:
Renée
Cloclo

You can also find this tutorial translated into these languages:
(Click on the flag)


SCRIPT
Notes:
> Open the material / Duplicate (shift+d) / Close the originals
> Change the blend mode of the layers to match their colors.
> In older versions of PSP, Mirror Horizontal=Mirror / Mirror Vertical=Flip /
Pick tool=deformation
1. Open the
mask [narah_mask_1175] and minimize it
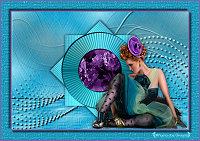
2. Open a new transparent image measuring 1000x600px
3. Selections / Select all
4. Copy the image [1727022942831] and paste it into the selection
5. Select none
6. Colorize using a method of your choice, in case of using other
images
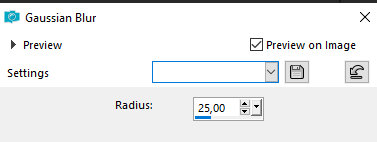
7. Adjust / blur / Gaussian Blur=25
8. Effects / Plugins / Unlimited 2 / Greg's
Factory Output Vol II / Shatter
9. Effects / Edge Effects / Enhance More
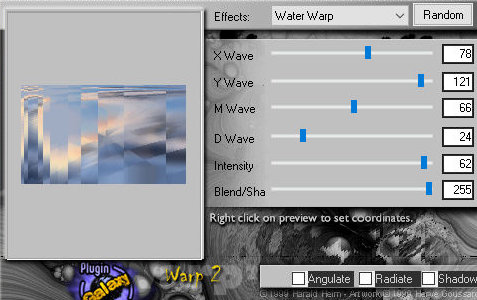
10. Effects / plugins / Plugin Galaxy / Warp 2 / Water Warp
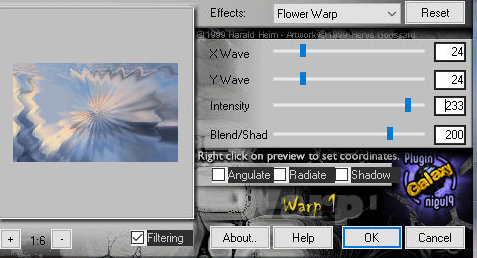
11. Effects / Plugins / Plugin Galaxy / Warp 1 /
Flower Warp
12. Effects / Reflection Effects / Rotating mirror
- default
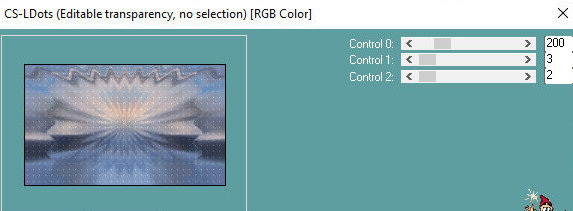
13. Effects / Plugins / Carolaine and Sensibility
/ CS_LDots
14. Add a new layer
15. Paint with white color
16. Layers / New mask layer / From Image / Mask [narah_mask_1175]
17. Merge Group
18. Adjust Sharpness / Sharpen
19. Copy the main tube [as tube 354] and paste as a new layer
20. Drop shadow of your choice and position according to the model
or as you wish
21. Copy the text tube [nrb_art_textos_words] and paste as a new
layer
22. Position according to the model
23. Drop Shadow: 5 -5 100 5 a color from the image
24. Effects / distortion Effects / Wave
25. Copy the tube [nrb_art_deco_87] and paste as a
new layer
26. (Optional) Colorize
27. Position in the upper left corner (see model)
28. Layers / Duplicate
29. Image / Mirror / Mirror Horizontal
30. Layers / Duplicate
31. image / Mirror / Mirror Vertical
32. Layers / Duplicate
33. Image / Mirror / Mirror Horizontal
34. Image / Add borders / 2px / white
35. Image / Add borders / 3px / One color from the image
36. Image / Add borders / 2px / white
37. Selections / Select all
38. Image / Add borders / 50px / white
39. Copy (will stay in memory)
40. Selects / Invert
41. Paste the image that is in memory into the selection
42. null
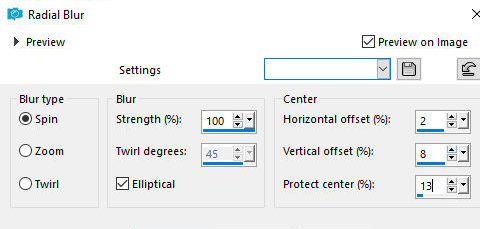
43. Adjust / Blur / Radial Blur
44. Effects / Plugins / unlimited 2 / Buttons &
Frames / Glass Frame 2
45. Effects / Plugins / unlimited 2 / Buttons &
Frames / / 3D Glass Frame 2
46. Effects / Plugins / Carolaine and Sensibility
/ CS_LDots
47. Adjust / Sharpness / Sharpen More
48. Select none
49. Image / Add borders / 2px / white
50. Image / Resize: 1000px(width)
51. Adjust / Sharpness / Sharpen
52. Add signatures
53. Merge all
54. Save as jpeg
*


|


