|
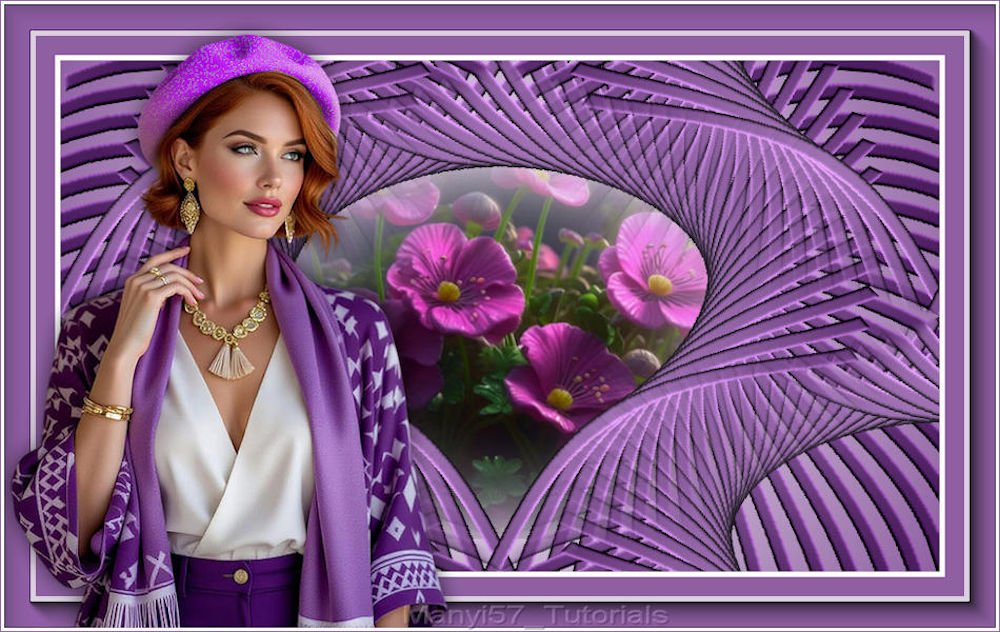
versão original de Manyi
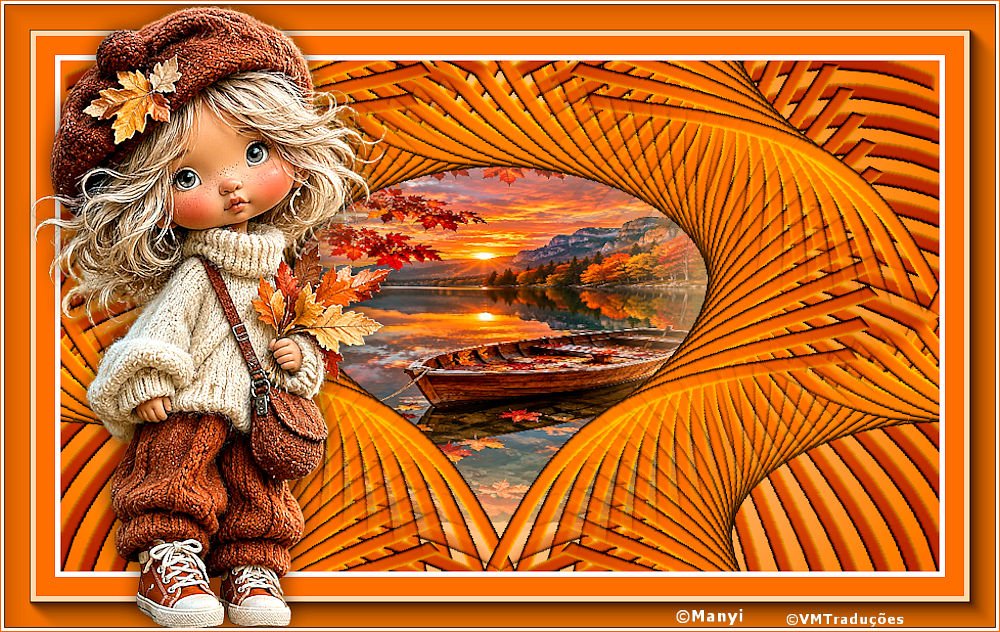
Minha versão

This tutorial is from who I thank for
letting me translate their tutorials.

Original here
Tubes

Material

Plugins
Unlimited 2 - FF Gallery B - Mura's
Meister - AAA Frames
You can find these plugins on the websites of:
Renée
Cloclo
You can also find this tutorial translated into these languages:
(Click on the flag)


|
Notes:
> Open the material / Duplicate (shift+d) / Close the originals
> Change the blend mode of the layers to match their colors.
> In older versions of PSP, Mirror Horizontal=Mirror / Mirror Vertical=Flip /
Pick tool=deformation
> Open the masks in psp and
minimize
>Adjust the size of the tubes according to your images
|
INSTRUCTIONS
Required:
1 female tube
1 floral or landscape tube
***
01. Open a new transparent image, 860x500 px.
Activate the Selection Tool (Custom Selections) and configure it as follows:
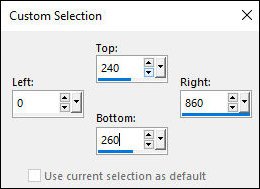
Fill the selection with the color #8f61a2.
Select None.
03. Resize: 80% (ensure "All layers" is unchecked).
04. Effects - 3D Effects - Inner Bevel
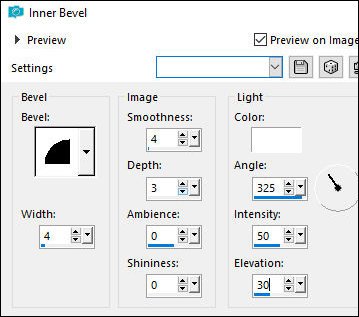
05. Effects - Plugins - Unlimited 2 - FF Gallery B - Fluttering Flag
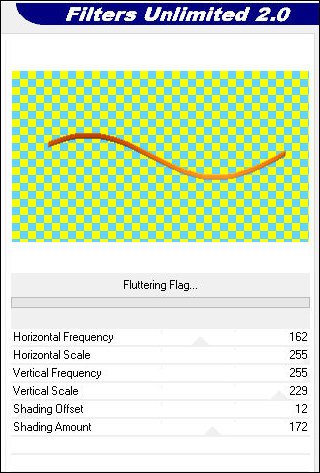
06. Effects - Plugins - Mura's Meister - Copies
(Note: This "Copies" plugin can be a bit finicky. Sometimes, for no
apparent reason, it may cause an issue where the output format looks
wrong—this happened to me. Simply clicking on the first frame (Number)
immediately corrected the image.)
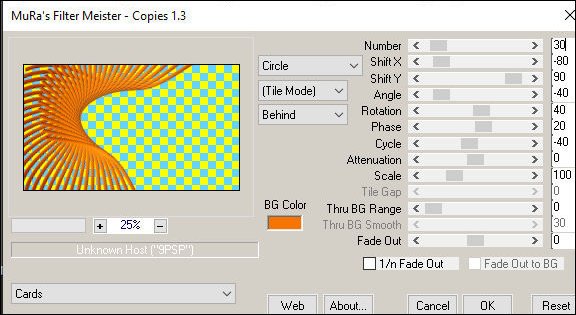
07. Layers - Duplicate
08. Image - Mirror Horizontal
Merge Down
09. Add a new layer.
Fill it with this gradient (use the following colors: Foreground:
#8f61a2, Background: white).
Note: The original tutorial suggests using the [agneta-regis]
gradient; however, it was not included in the provided materials,
and I do not have it. Therefore, I created a gradient using the
specified settings and the colors mentioned above.
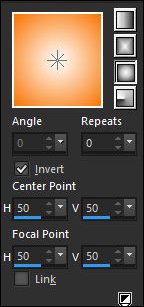
10. Layers - Arrange - Send to Bottom
11. Stay on this layer.
Copy the floral tube.
Paste as a new layer.
Pick Tool (K): X=182, Y=100. Press M.
12. Activate the top layer.
Layers - Duplicate
Effects - Image Effects - Seamless Tiling (default settings)
13. Border: 5px - #ffffff
Border: 50px - #8f61a2
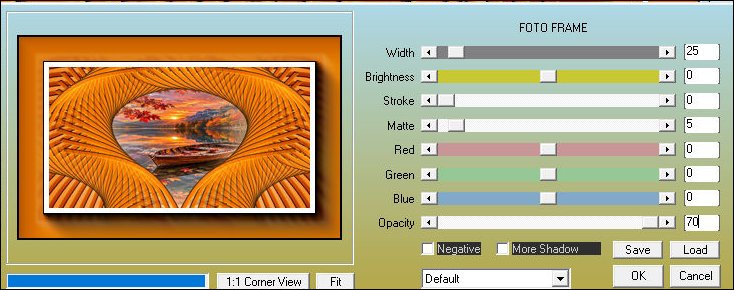
14. Effects - Plugins - AAA Frames - Foto Frame
15. Copy the main tube.
Paste as a new layer.
Adjust the size.
If using the... Material tube:
Pick Tool (K) X=5 Y=28 Press M
16. Adjust - Sharpness - Sharpen
17. Drop Shadow: 0 0 60 30.00 black
18. Border - 3px - #ffffff
Border - 1px - #8f61a2
19. Resize: 950x600px
Add credits
Save as JPEG

|