|
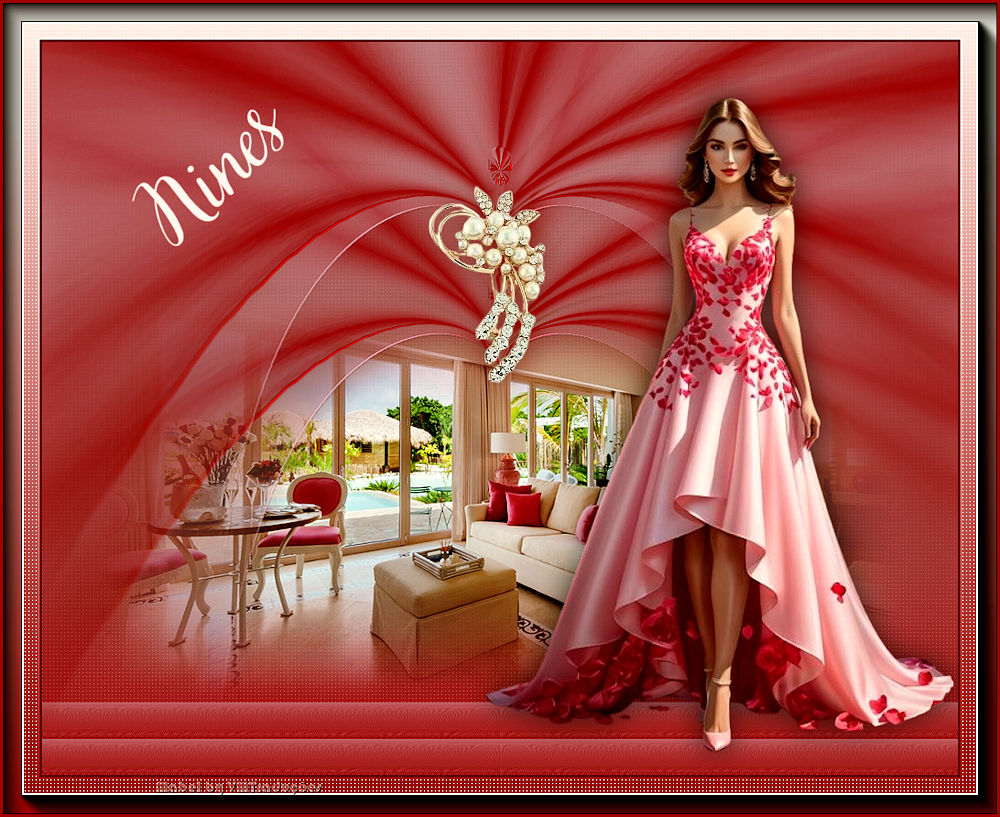

This tutorial is from Mabel who I thank for
letting me translate their tutorials.

Original here


Tubes


Material

Many thanks to the creators of
these materials


Plugins
FF Gallery N
Transparency
Flaming Pearl / Flexify 2
Penta.com

You can find these plugins on the websites of:
Renée
Cloclo

You can also find this tutorial translated into these languages:
(Click on the flag)


SCRIPT
Notes:
> Open the material / Duplicate (shift+d) / Close the originals
> Change the blend mode of the layers to match their colors.
> In older versions of PSP, Mirror Horizontal=Mirror / Mirror Vertical=Flip /
Pick tool=deformation
> Open the masks in psp and
minimize
>Adjust the size of the tubes according to your images
*
>> Save the mask [00gradient] in the PSP Masks
folder
1. Open a new transparent image measuring 1000x800px
2. Set the color #9a0d14 to the foreground and the color #d8b7cb to
the background

2b. Prepare a Linear Gradient

2c. Paint the image with the gradient
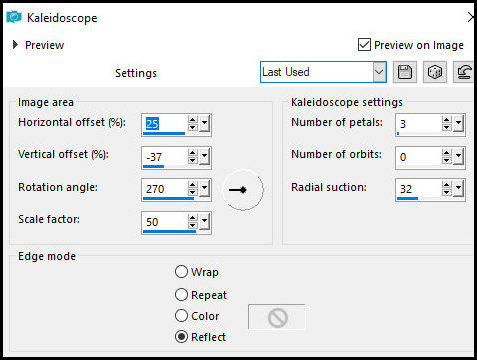
3. Effects - Reflection Effects - kaleidoscope
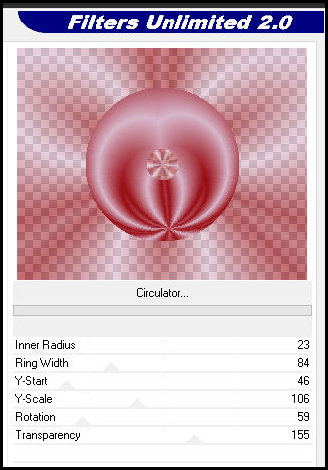
4. Effects - Plugins- Unlimited 2 - FF Gallery N - Circulator
5. Effects - plugins - Transparency - Eliminate White
6. Image - Mirror - Mirror Vertical
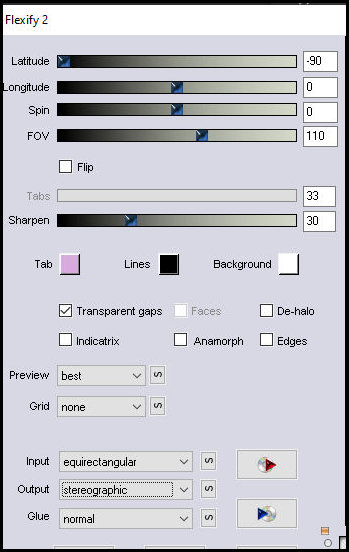
7. Effects - plugins - Flaming Pearl - Flexify 2
8. Effects - Geometric Effects - Vertical Perspective [90/transparent]
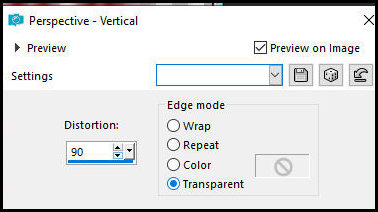
9. Effects - Plugins - Flaming Pearl - Flexify 2 - same as above
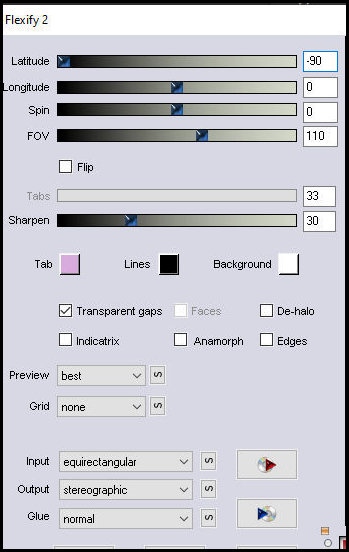
10. Effects - User Defined Filter - Emboss 3

11. Layers - Load mask from disk - Mask [00gradient]
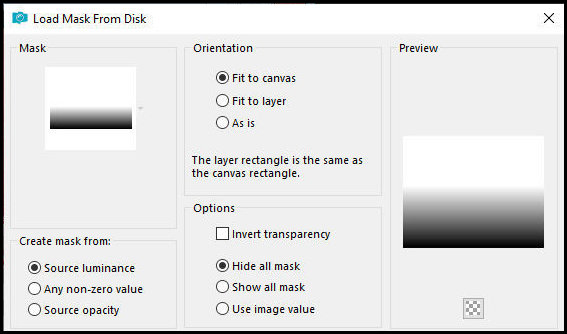
11b. Repeat mask
11c. Merge group
12. Layers - Duplicate
13. Effects - Image Effects - offset [0/-140]
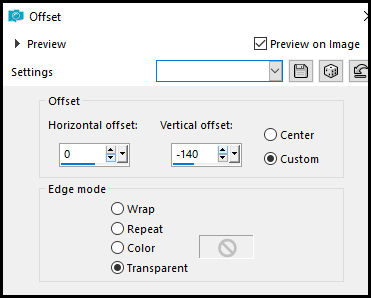
14. Merge Down
15. Drop shadow: 0 0 65 45 #762116
15b. Repeat Drop Shadow
16.Adjust - Sharpness - Sharpen
17. Activate the Pick Tool and configure: X=0 Y=-40

18. Add a new layer
18b. Layers - Arrange - Send to Bottom
19. Paint with this other gradient

20. Effects - plugins - Penta.com - Color Dot
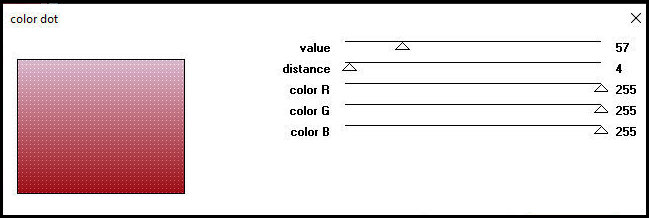
21. Layers - Duplicate
22. Effects - plugins - Mura's meister - Perspective Tiling

23. Layers - Duplicate
24. Effects - Image Effects - offset [0/-40]

25. Merge down
26. Effects - user Define Filter - Emboss 3

27. Copy the misted landscape tube and paste as a new layer
28. Effects - Image Effects - offset [0/-100]

29. Copy the [adorno-mabel] tube and paste as a new layer
29b. Position according to the model
30. Drop Shadow as before
30b. Repeat the Drop shadow
31. Copy the character tube and paste as a new layer
31b. Position as per model
32. Drop Shadow as above - black color
33. Choose a font and type the text "Nines" with a setting of your
choice
33b. Right-click on the layer and select Convert to Raster Layer
33c. Position as per model
34. Merge visible
35. Image - Add borders - 3px - #660716
36. Image - Add borders - 40px - white
36b. Select this border with the Magic Wand - tolerance/feather=0
36c. Paint with the gradient
37. Effects - plugins - Penta.com - Color Dot

37b. Repeat the Color dot
38. Adjust - Sharpness - Sharpen More
39. Effects - plugins - AAA Frames - Foto Frame
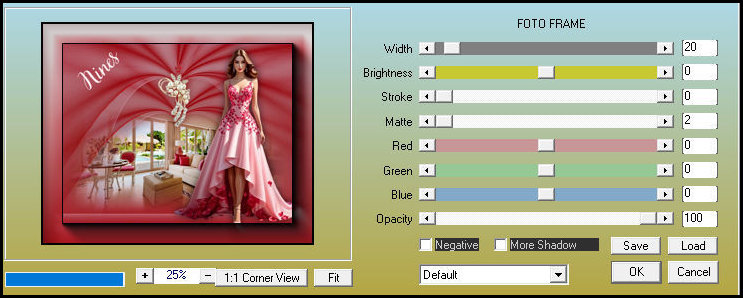
39b. Repeat the photo frame
40. Image - Add borders - 3px - #660716
41. Add signatures
41b. Merge all
41c. Save as jpeg
*


|


